KBC Poker 40% New design of the keyboard frame part.1
Posted: 16 Mar 2011, 06:01
KBC Poker 40% New design of the keyboard frame part.1
Hi, I"m a keyboard fan from Taiwan
Very pleased to come here to share with you information about the keyboard
Recently I got the keyboard KBC poker 40%
PBT keycap and cherry black posed by the mechanical axis of the keyboard, and keys location has not been changed.
I feel very satisfied of the keyboard. I was quite happy at the time.
But I think KBC poker 40% could be better
So I started thinking, I want to add more functions, to make it perfect
The following summarized design ideas.
1. Storable USB cable
40% of the keyboard to go out quite easily, if the USB cable can be incorporated in the function of adding even more ideal. It can be forget to bring the USB cable out to avoid the dilemma.
2. USB cable can be adjustable
As an external device, sometime we need longer cable, if the cable can be adjusted so that will be the best.
3. Hight of the Keyboard can be adjust
I always liked adjustable keyboard, if they can add this features it would be ideal.
I am a industrial designer, so I am quite familiar with the product design process
So I started working the design of the KBC poker 40%
I can add three more functions.
(The sharing will be completed in two articles)
In order to achieve the exact size, I first disassembled the keyboard KBC poker 40%
And take it to 3D reverse scan
As the white spray paint scanning needs, it becomes like this
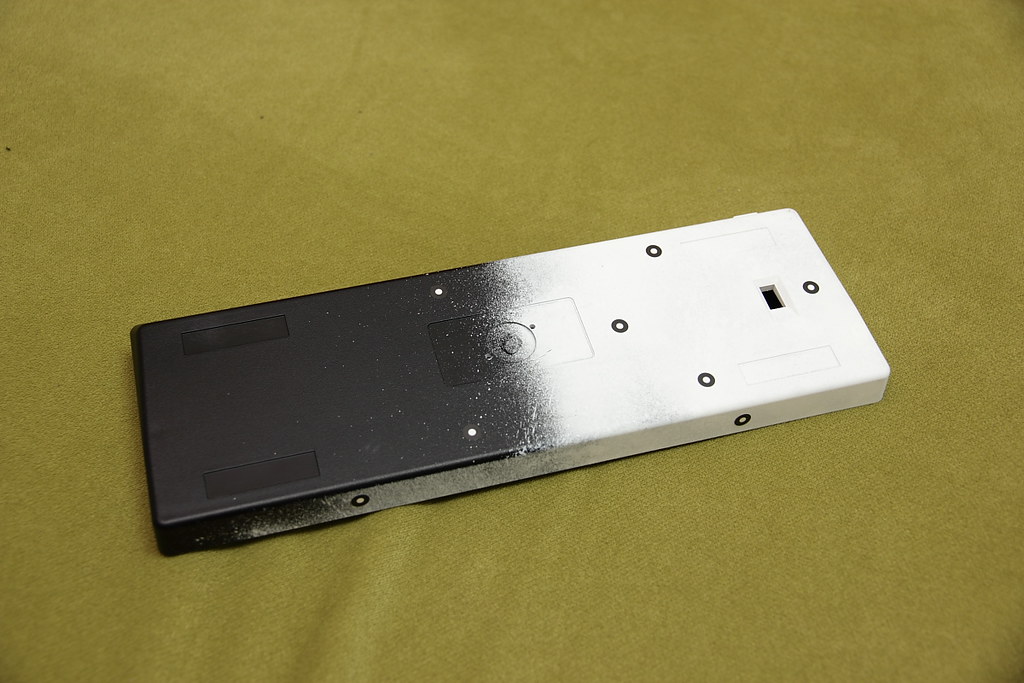
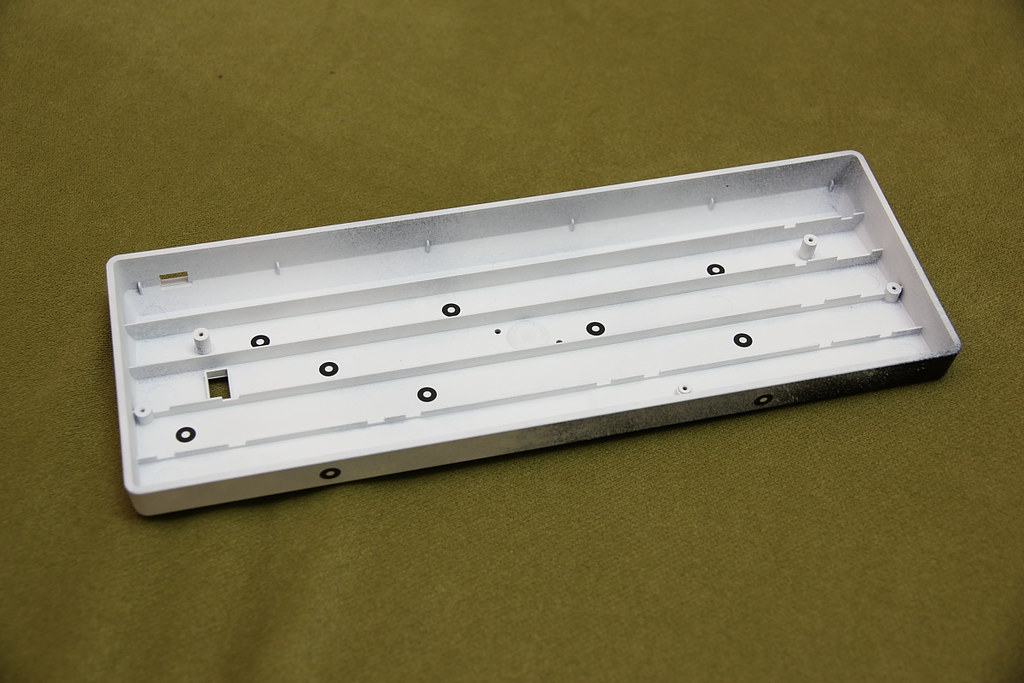
After I use 3D graphics software, the 3D rendering completed in full accordance with the ratio of 1:1
And in the frame I want to add functionality.
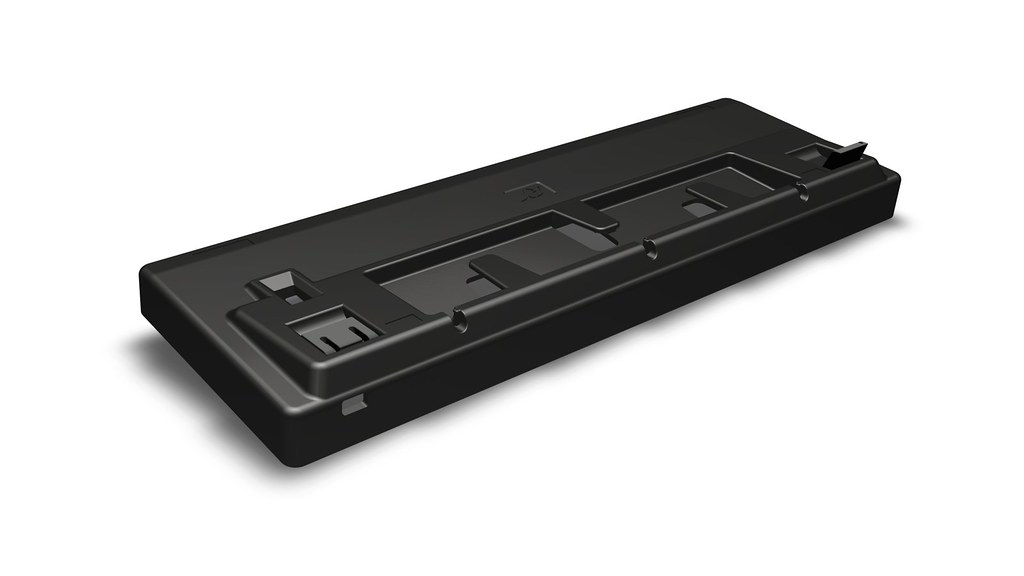
This is a 3D drawing final look, I have considered the feasibility of the die mold. This is certainly not problem.
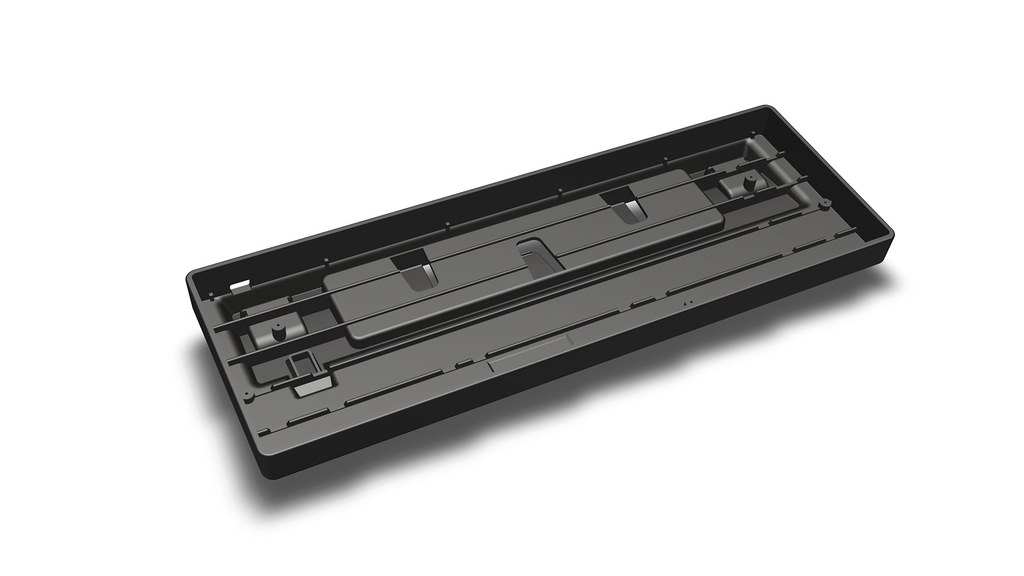
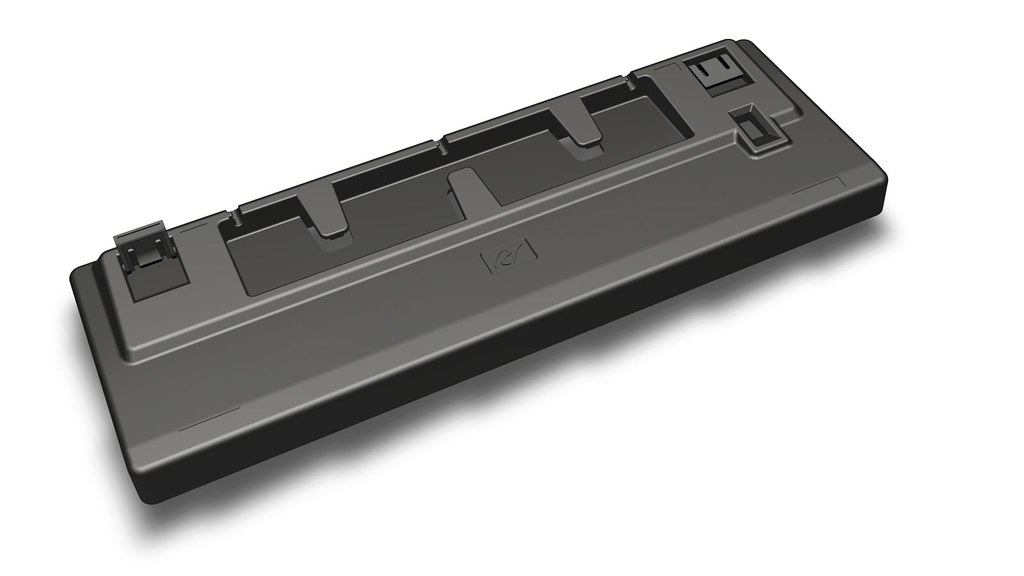
Then, making the sample frame
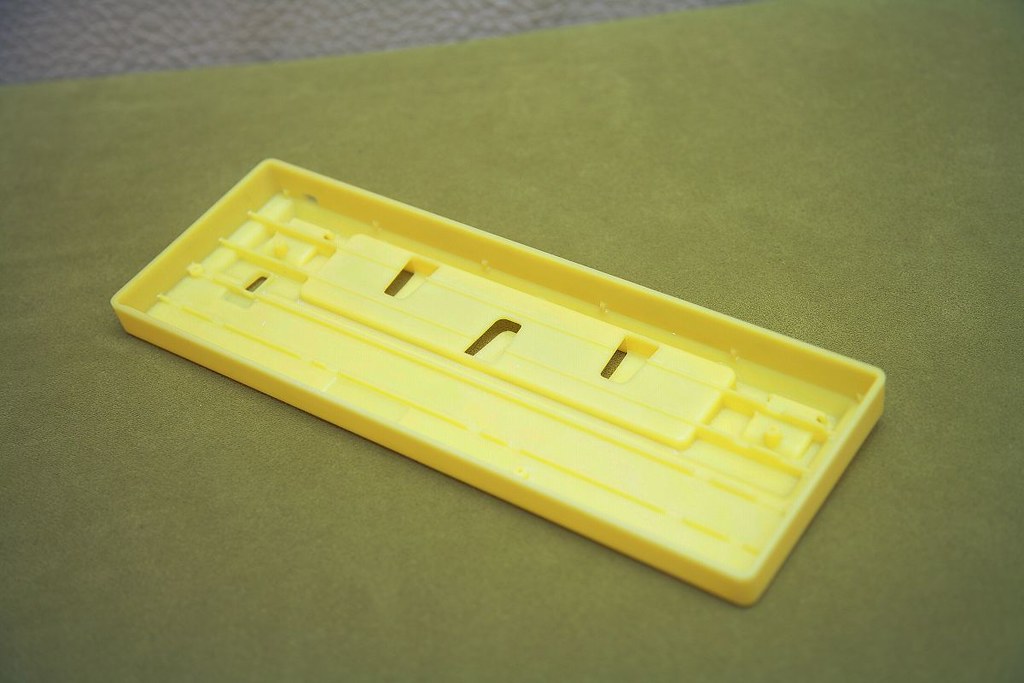
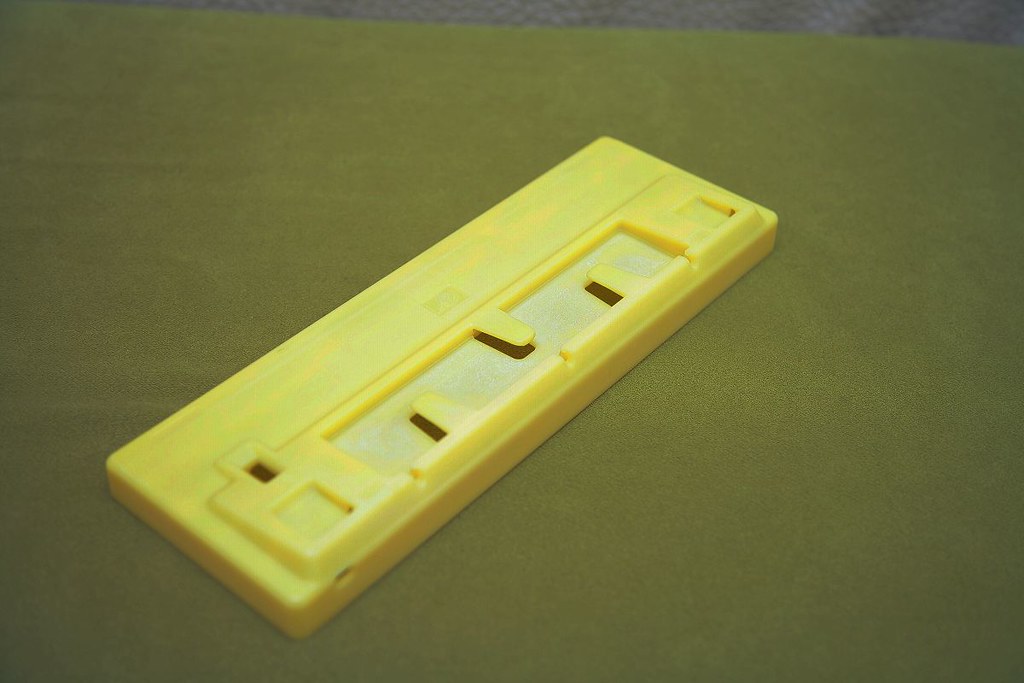
I used to draw a 3D CNC in accordance with drawings to process samples
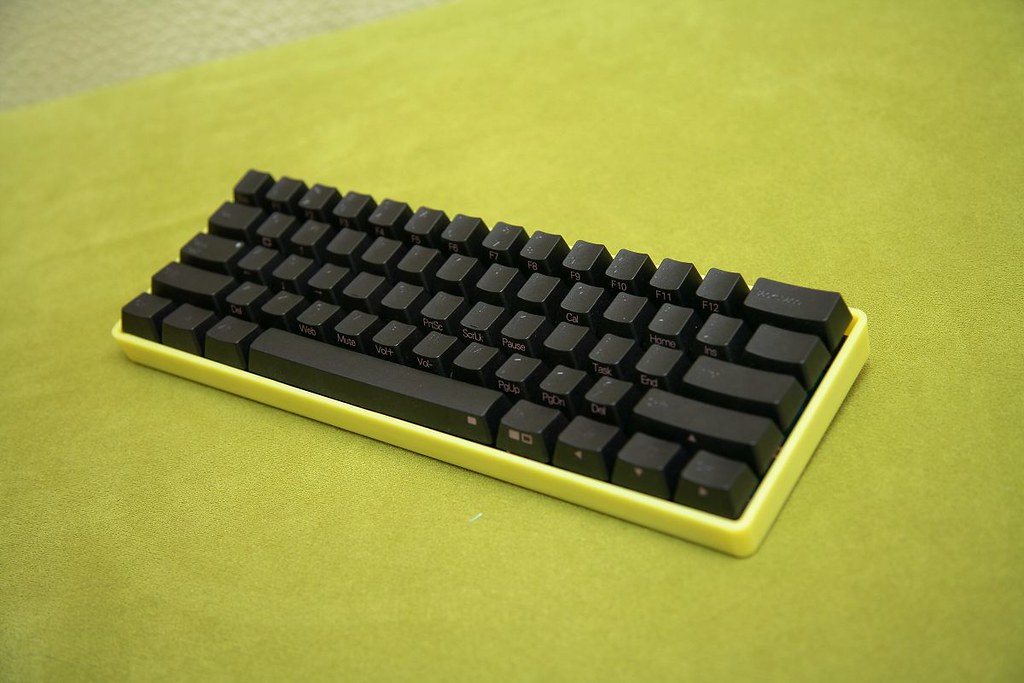
Figure not yet completed processing of plastic paint colors
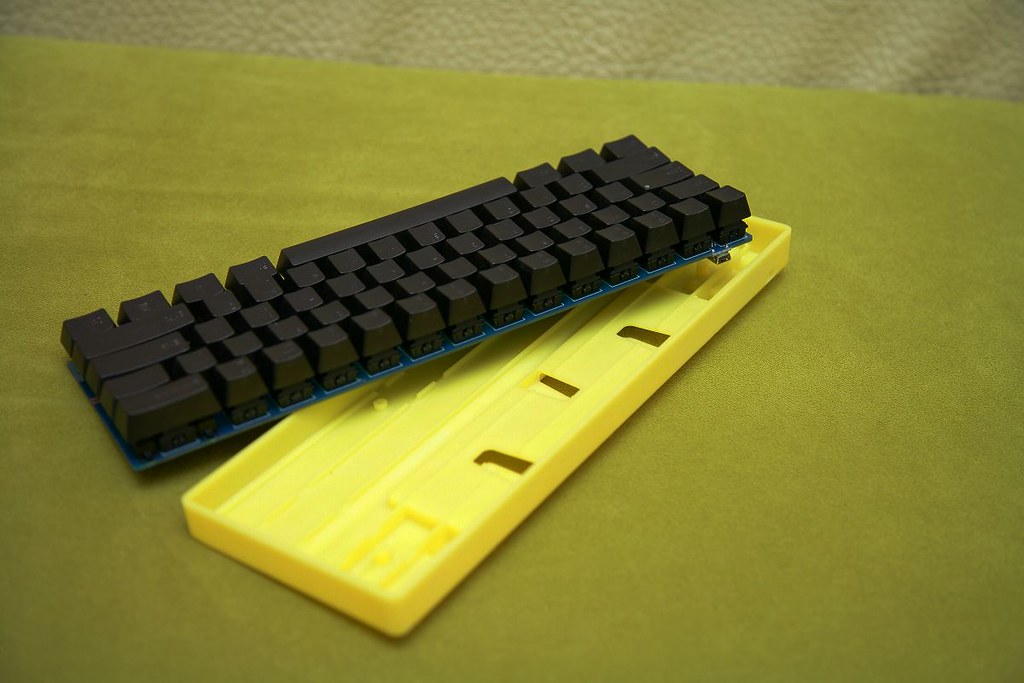
Assembly testing
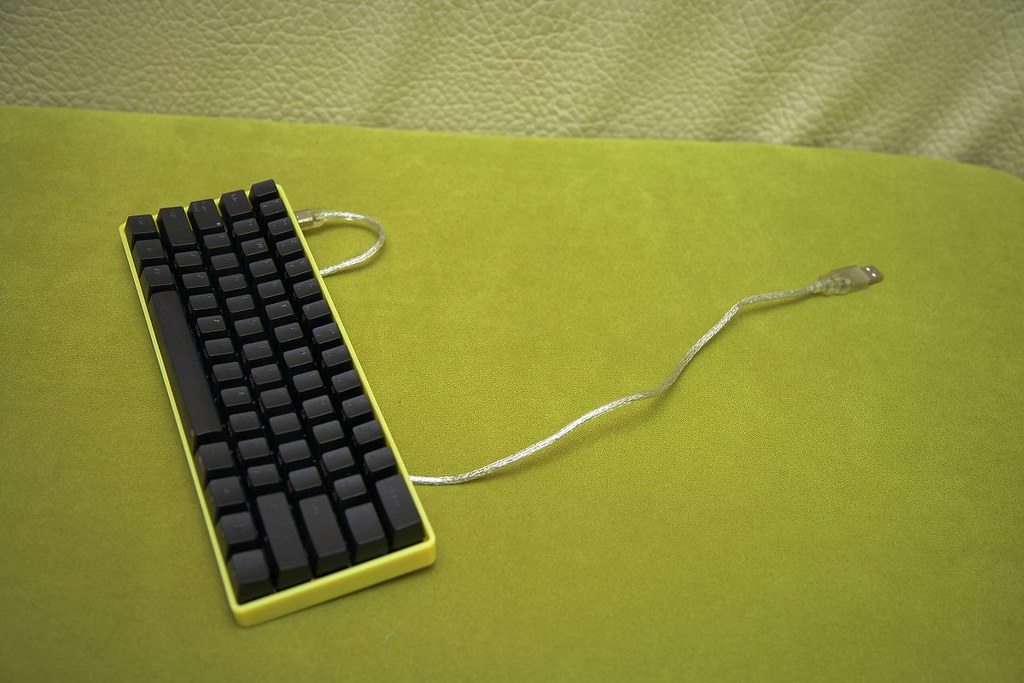
KBC poker 40% I have remove the load board that and put into the sample frame which I designed myself
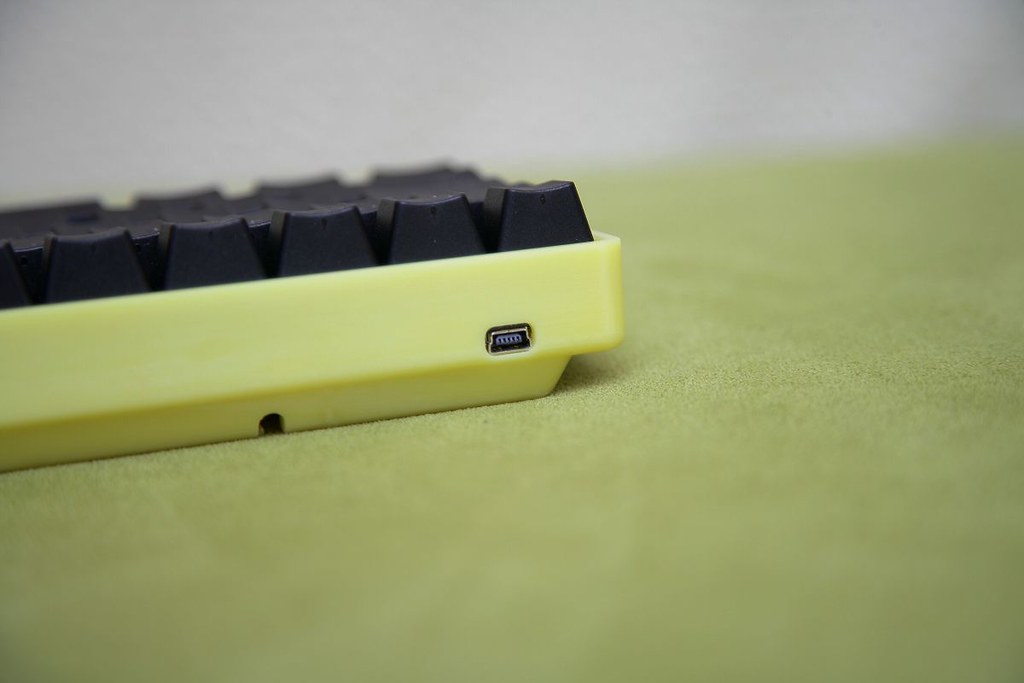
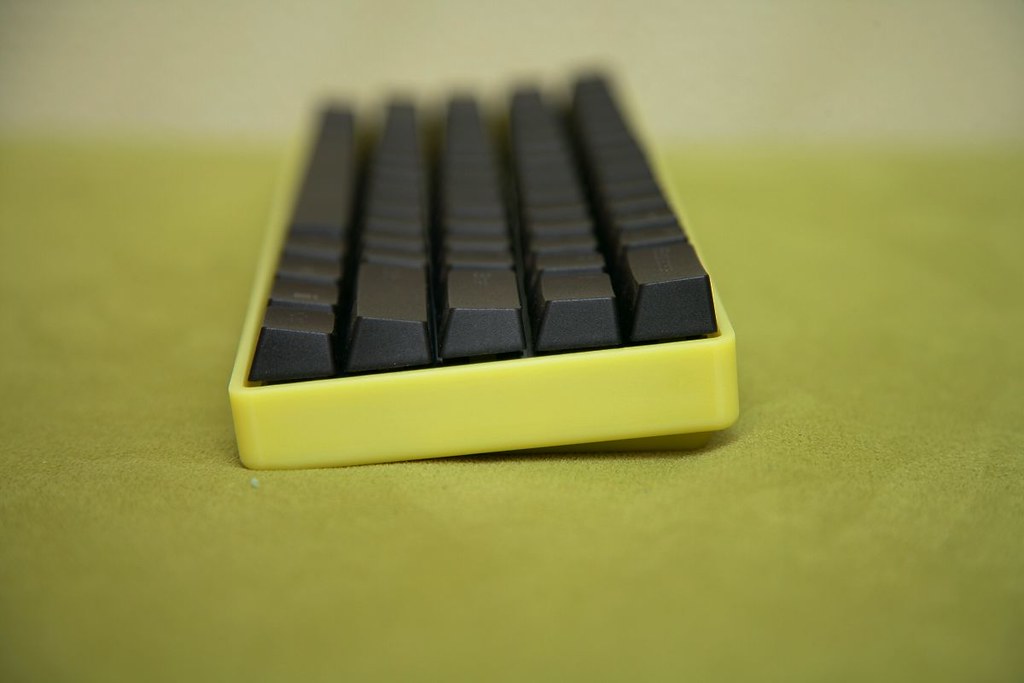
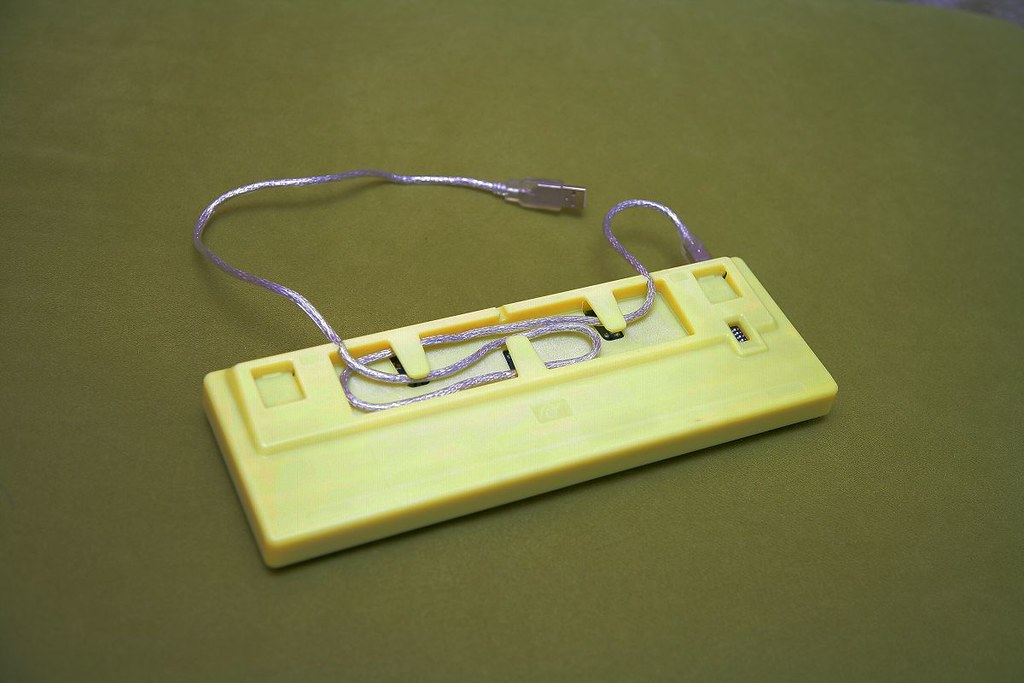
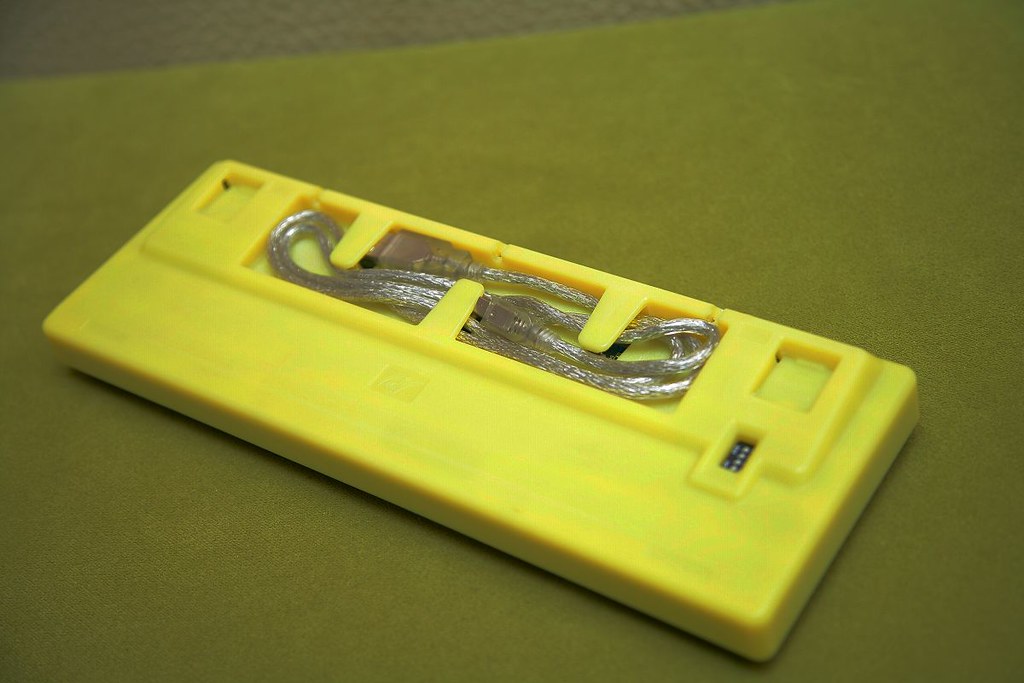
Storage USB cable test
50cm USB cable
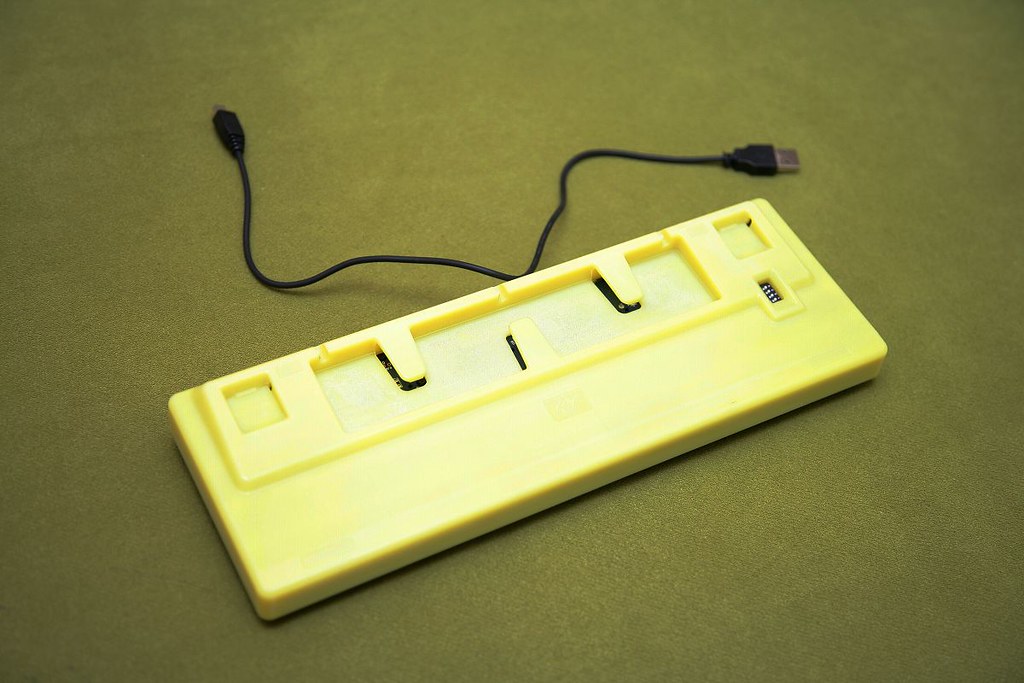
USB wire diagram incorporating
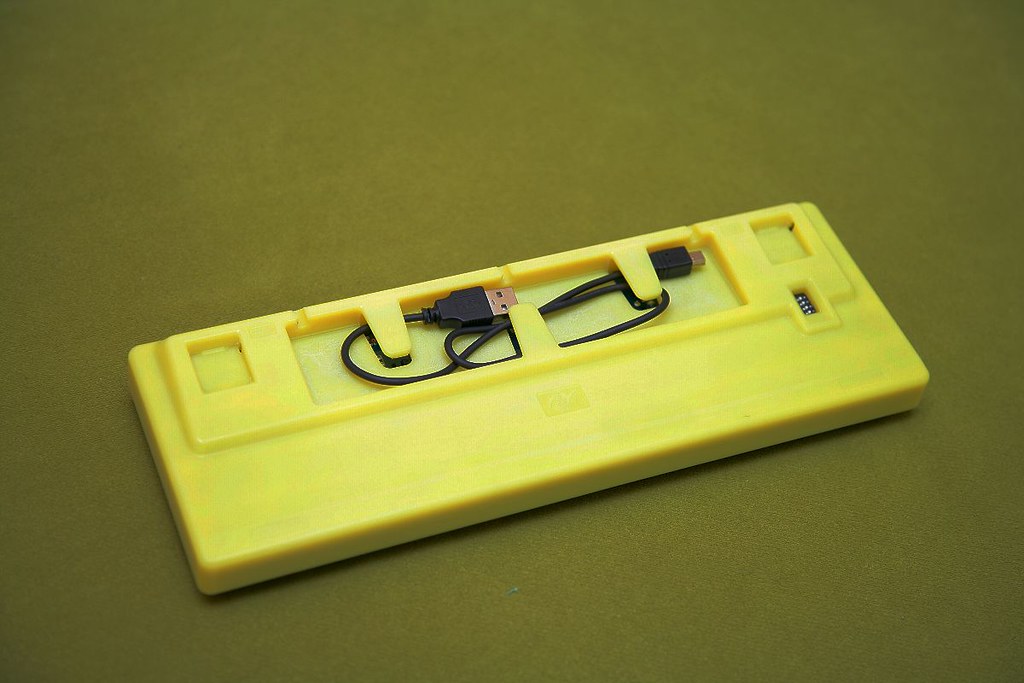
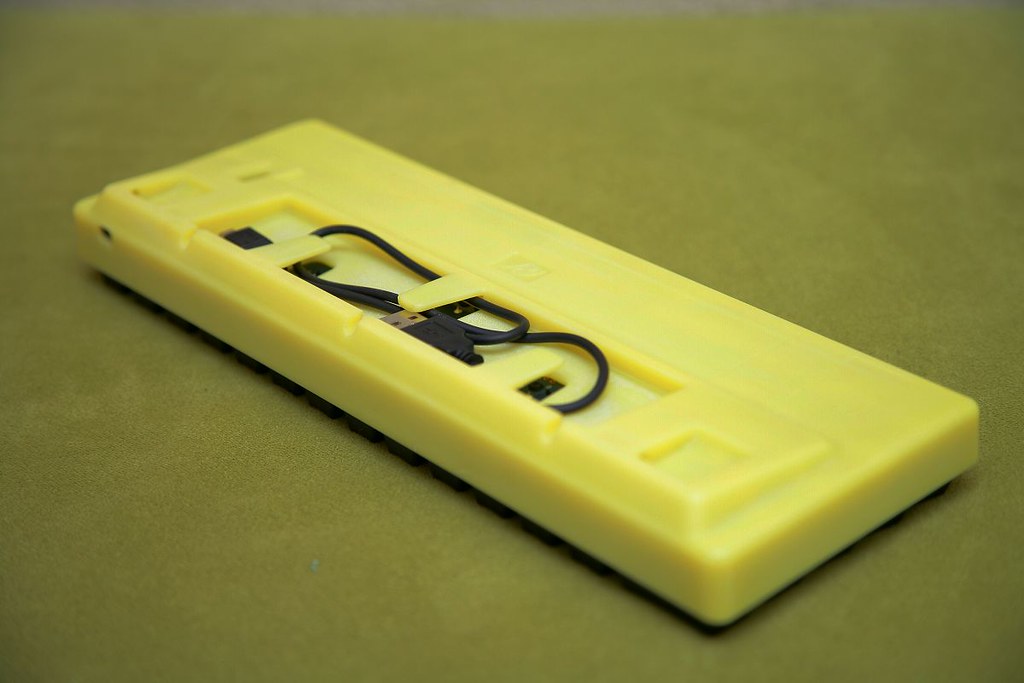
100cm USB cable
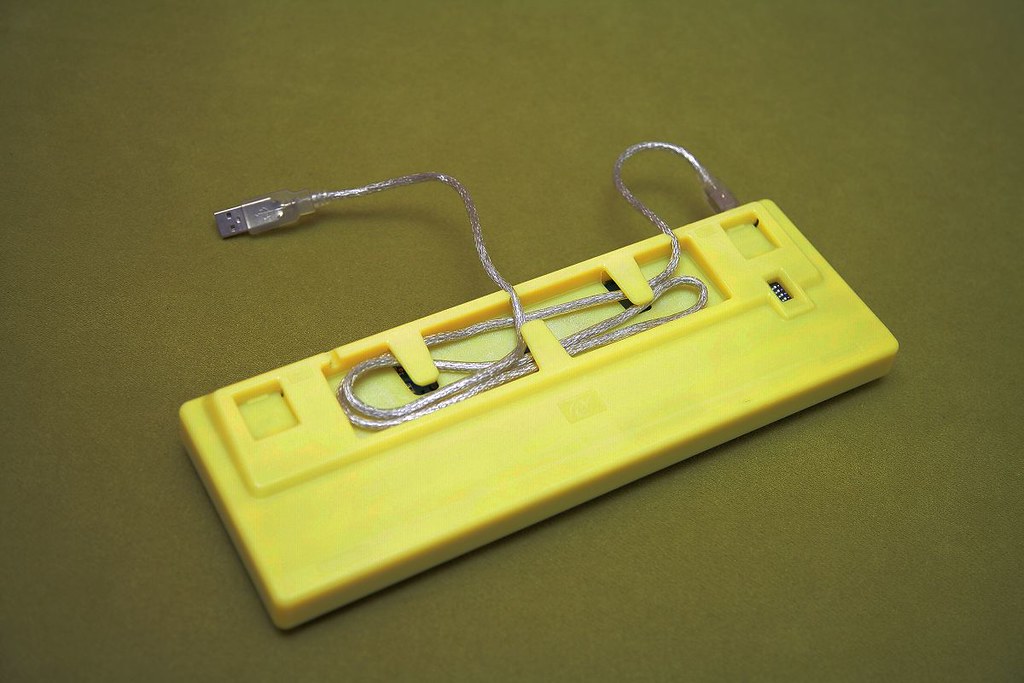
With three holes to reach the control pressure line the length of USB cable length
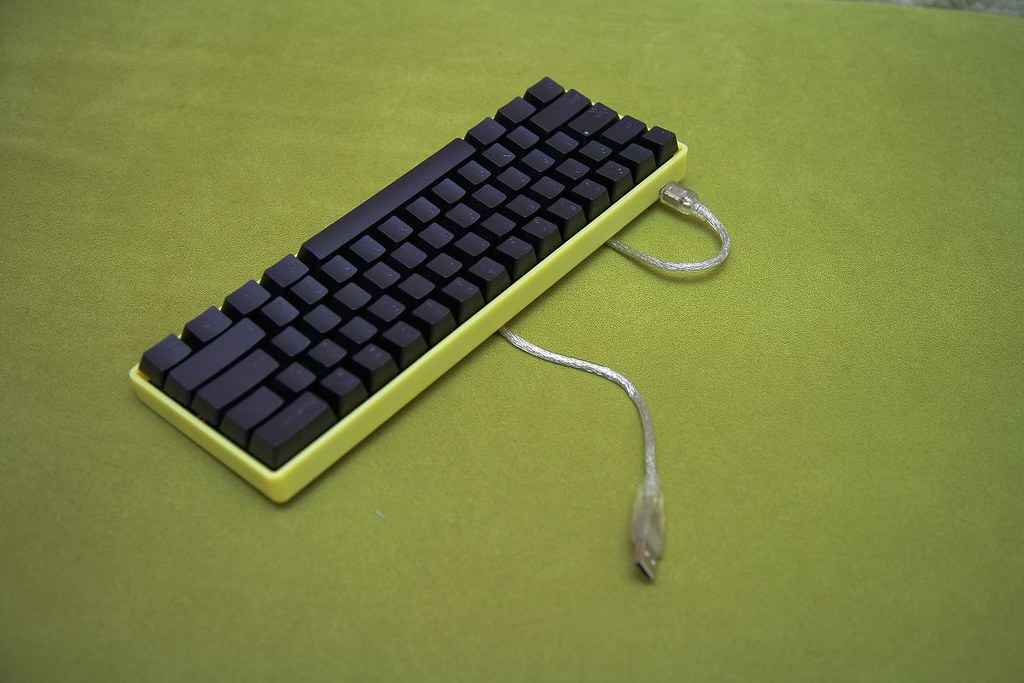
Use it with ipad
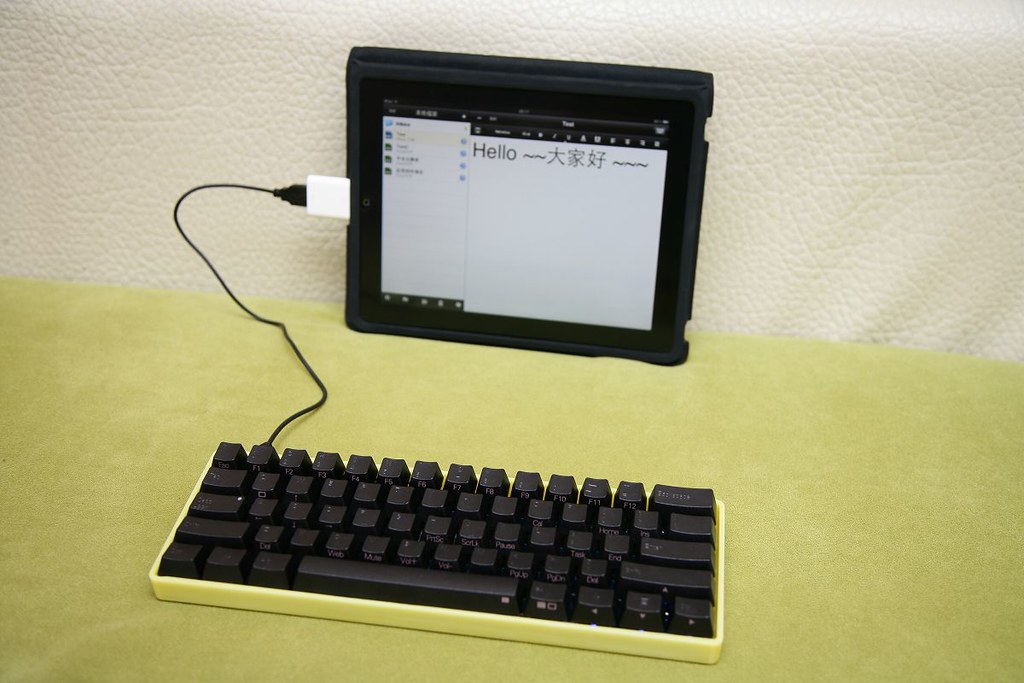

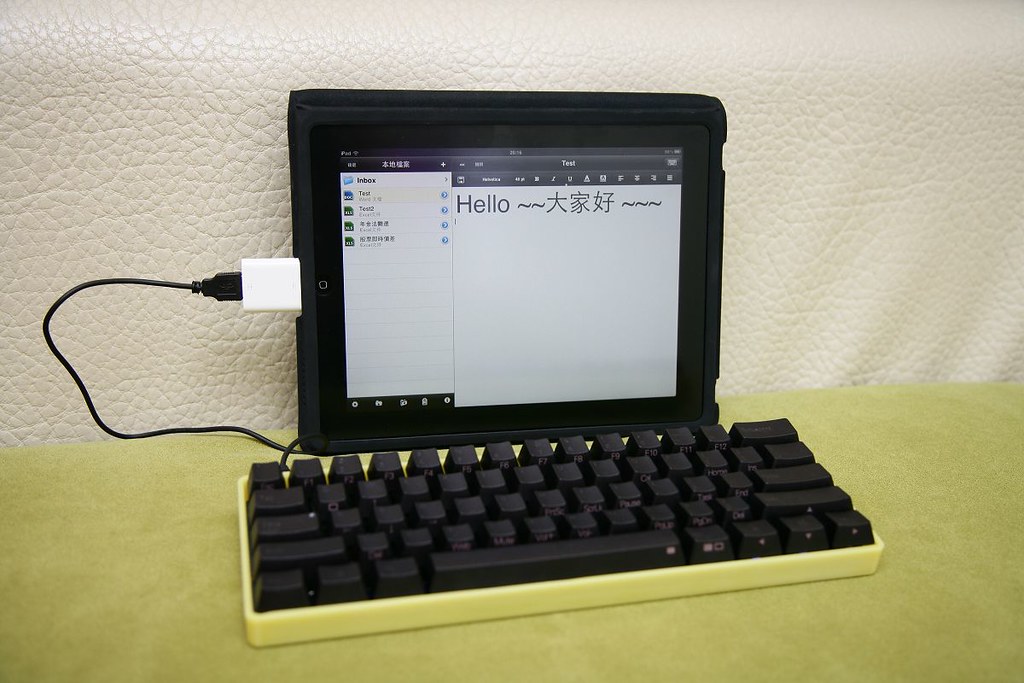
Currently the keyboard frame is not yet completed
There are keyboard stand not making and the frame needs painting
I prefer to paint color in iron-gray
Please look forward to part 2
And please respect this article as intellectual property, without my approval, please do not reprint articles
Thanks
Brian
My BLOG
http://design1978.pixnet.net/blog/post/33520525
Hi, I"m a keyboard fan from Taiwan
Very pleased to come here to share with you information about the keyboard
Recently I got the keyboard KBC poker 40%
PBT keycap and cherry black posed by the mechanical axis of the keyboard, and keys location has not been changed.
I feel very satisfied of the keyboard. I was quite happy at the time.
But I think KBC poker 40% could be better
So I started thinking, I want to add more functions, to make it perfect
The following summarized design ideas.
1. Storable USB cable
40% of the keyboard to go out quite easily, if the USB cable can be incorporated in the function of adding even more ideal. It can be forget to bring the USB cable out to avoid the dilemma.
2. USB cable can be adjustable
As an external device, sometime we need longer cable, if the cable can be adjusted so that will be the best.
3. Hight of the Keyboard can be adjust
I always liked adjustable keyboard, if they can add this features it would be ideal.
I am a industrial designer, so I am quite familiar with the product design process
So I started working the design of the KBC poker 40%
I can add three more functions.
(The sharing will be completed in two articles)
In order to achieve the exact size, I first disassembled the keyboard KBC poker 40%
And take it to 3D reverse scan
As the white spray paint scanning needs, it becomes like this


After I use 3D graphics software, the 3D rendering completed in full accordance with the ratio of 1:1
And in the frame I want to add functionality.
This is a 3D drawing final look, I have considered the feasibility of the die mold. This is certainly not problem.


Then, making the sample frame
I used to draw a 3D CNC in accordance with drawings to process samples
Figure not yet completed processing of plastic paint colors


Assembly testing
KBC poker 40% I have remove the load board that and put into the sample frame which I designed myself


Storage USB cable test
50cm USB cable

USB wire diagram incorporating


100cm USB cable

With three holes to reach the control pressure line the length of USB cable length


Use it with ipad


Currently the keyboard frame is not yet completed
There are keyboard stand not making and the frame needs painting
I prefer to paint color in iron-gray
Please look forward to part 2
And please respect this article as intellectual property, without my approval, please do not reprint articles
Thanks
Brian
My BLOG
http://design1978.pixnet.net/blog/post/33520525


