Page 1 of 1
Vintage Key Tronic Foam and Foil Board Switch Mod, Teensy USB
Posted: 20 Jul 2017, 16:09
by OldIsNew

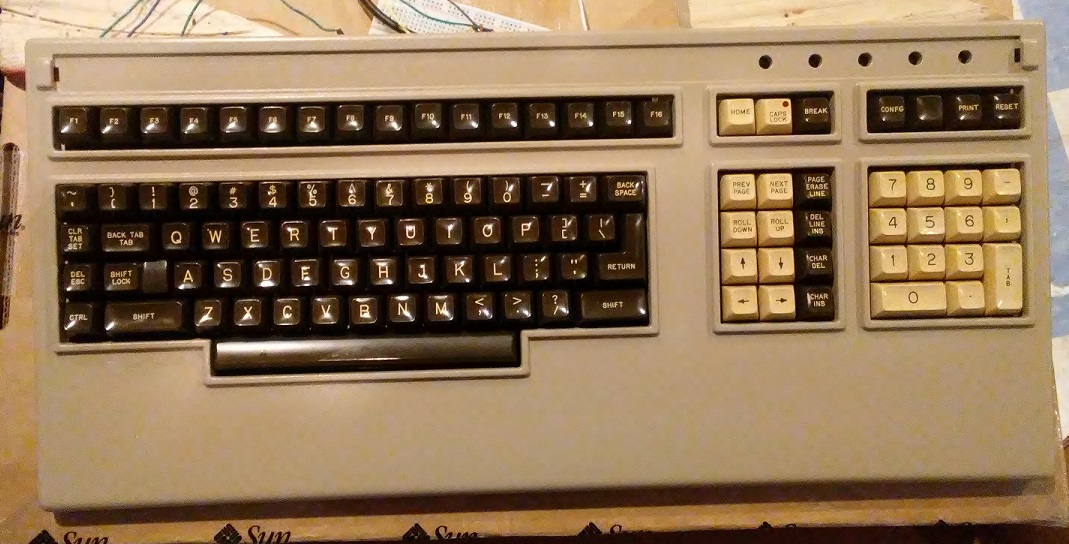
- front.jpg (345.54 KiB) Viewed 3915 times
I thought this was a cool old board and I very much disliked the idea of having a board I could not actually use on my computer. I wanted to use the board and also largely just wanted to see if this would work - and it did.
I recently bought a Tandem Computers terminal keyboard with vintage Key Tronic foam and foil switches. I like the look of the board and the keys actually feel pretty nice. I have not found much on what protocol the board uses and it didn't look like I was going to find a simple converter for it. The foam pads were in good shape so I decided to try modifying the switches from capacitive foam and foil to foam and copper contacts and hand wire it. This was done primarily with material from Lowe's Home Improvement - used copper flashing to make switch contacts for a new "PCB" and for the contacts over the Mylar on the foam switch plungers. 14 AWG solid core wire for switch posts, an acrylic sheet for the "PCB".
I traced out the switch layout on the acrylic sheet then cut out the "PCB" contact pads from the flashing. Drilled holes in the contact pads and acrylic board and then made posts for the switch contacts from the 14 AWG wire; used a 7/16" punch for the copper flashing disks for the foam.
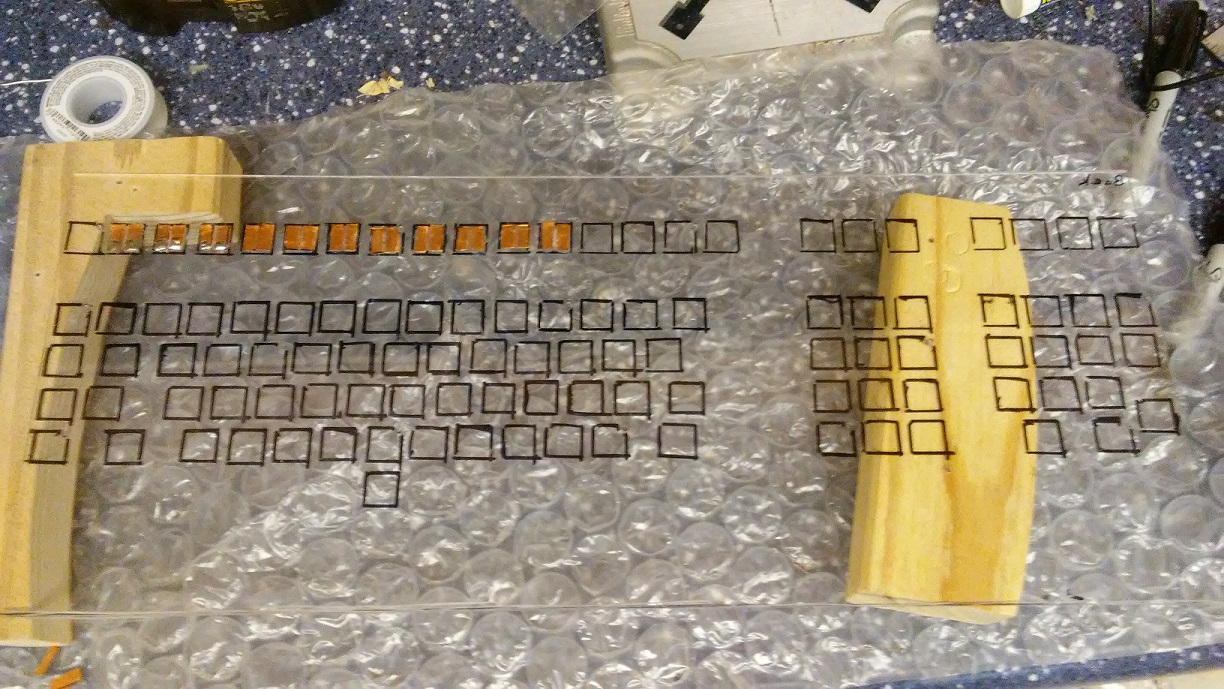
- PCB.jpg (388.67 KiB) Viewed 3915 times
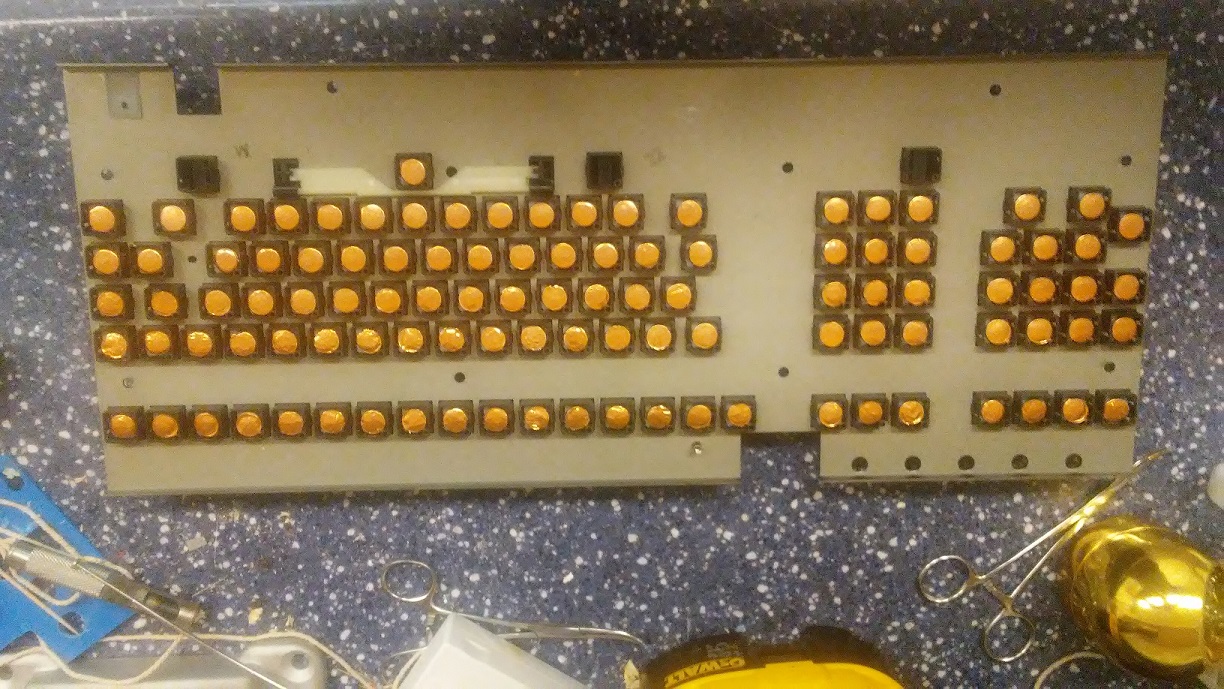
- Contacts2.jpg (386.43 KiB) Viewed 3915 times
Super glued the flashing in place and then spent a lot of time testing and adjusting the switches and contact pads - it took a while - but they work. Then soldered the diodes, rows and columns and hooked up the Teensy. It works and I'm typing on the keyboard now.
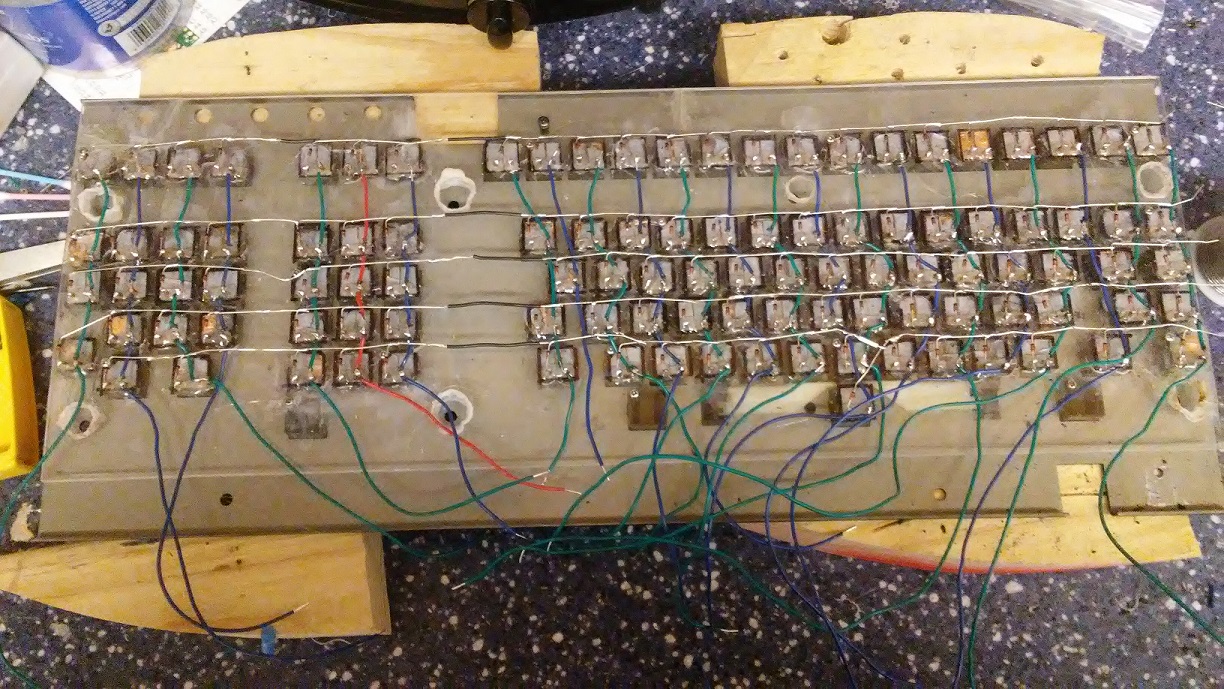
- Wired.jpg (432.54 KiB) Viewed 3895 times
- Teensy1.jpg (273.61 KiB) Viewed 3915 times
- Teensy2.jpg (223.11 KiB) Viewed 3915 times
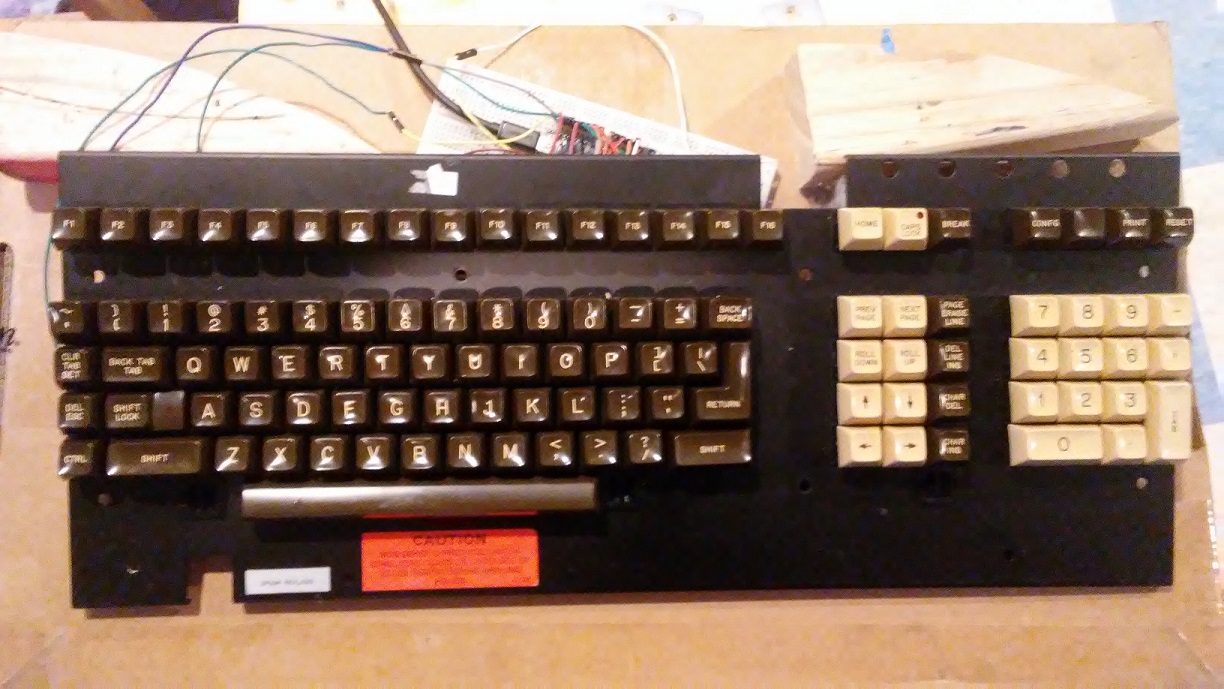
I cannot feel any noticeable difference in the switches after the mod. That was a goal - I wanted to get the board working without significantly altering the original feel of it. Now that it's working I'm planning on hooking up the lock light LEDs and cleaning up the case wiring.
Posted: 20 Jul 2017, 16:17
by seebart
Foam and copper eh?

Interesting idea! Very crafty indeed.
Awesome to see someone enthusiastic about Vintage Key Tronic Foil like this. How old is that keyboard anyway?
Posted: 21 Jul 2017, 01:13
by OldIsNew
seebart wrote:
... How old is that keyboard anyway?
There are two stamps on the inside of the front case one is: "11 1984" the other: "DEC 8 1986"
Posted: 21 Jul 2017, 17:14
by XMIT
Oh, that's really clever, and dead simple. Thanks for posting this!
There are a bunch of really nice Keytronic Foam and Foil boards out there with old school sculpted sphericals that are great if you're into linear switches. This is one of them! It weighs a TON. I've got one, maybe two. elecplus had a whole bunch of them at one point, I think they're all gone now.
One thing I like about this one is that you can get an inverted-T arrow cluster if you move some keys around.
Be CAREFUL pulling caps on these. Pull *straight up* with a wire key cap puller. Pulling at an angle will break the legs (though they're ABS plastic so Krazy Glue works great to repair them). Plastic key cap pullers won't get enough force.
I've thought about putting an xwhatsit on the original PCB and doing capsense. Maybe one day.
Posted: 31 Jul 2017, 08:51
by PancakeMSTR
I've got a foam and foil that I want to convert the "hard" way, since there is literally zero information about it, but I'm gonna take a slightly different brute force approach. Wish me luck boys.
Posted: 31 Jul 2017, 16:41
by XMIT
Well it's capsense, so I think xwhatsit should work beautifully here.
Posted: 31 Jul 2017, 21:20
by PancakeMSTR
XMIT wrote: Well it's capsense, so I think xwhatsit should work beautifully here.
I'm (not particularly) familiar with either capsense or xwhatsit. I'd honestly love it if you could give me some more details, I'm looking for any help I can get.
BTW, I don't think there's any easy way to convert this thing. I think I will have to somehow intercept (and possibly even generate) signals from the capacitive grid. The microcontrollers/ICs are....epically enigmatic.
Posted: 31 Jul 2017, 21:22
by XMIT
Right. So, xwhatsit is a capacitive sensing controller board replacement intended for Model M keyboards. I think it could work with any capacitive sensing keyboard, with the correct voltage threshold. Check around the forum for more information and documentation.
I don't know what the PCB for this board looks like, but, the idea is that you find the row and column traces, and wire those up to the xwhatsit directly.
Posted: 31 Jul 2017, 23:02
by PancakeMSTR
XMIT wrote: Right. So, xwhatsit is a capacitive sensing controller board replacement intended for Model M keyboards. I think it could work with any capacitive sensing keyboard, with the correct voltage threshold. Check around the forum for more information and documentation.
I don't know what the PCB for this board looks like, but, the idea is that you find the row and column traces, and wire those up to the xwhatsit directly.
Very interesting.
Posted: 01 Aug 2017, 04:38
by XMIT
I think you'll want to start with new foam. Many of these boards degrade quite badly. What irony - they were billed as "solid state" and super reliable at the time!
Posted: 01 Aug 2017, 05:03
by OldIsNew
XMIT wrote:
I don't know what the PCB for this board looks like, but, the idea is that you find the row and column traces, and wire those up to the xwhatsit directly.
XMIT wrote: I think you'll want to start with new foam. Many of these boards degrade quite badly. What irony - they were billed as "solid state" and super reliable at the time!
I'm going to have to look into the xwhatsit for another foam and foil board I have, a TRS-80 Model II. I would like to get a foam and foil working using the original PCB. Going to have to replace the foam pads on that one for sure they're all pretty much a sticky black mess.
Posted: 01 Aug 2017, 18:10
by PancakeMSTR
OldIsNew wrote: XMIT wrote:
I don't know what the PCB for this board looks like, but, the idea is that you find the row and column traces, and wire those up to the xwhatsit directly.
XMIT wrote: I think you'll want to start with new foam. Many of these boards degrade quite badly. What irony - they were billed as "solid state" and super reliable at the time!
I'm going to have to look into the xwhatsit for another foam and foil board I have, a TRS-80 Model II. I would like to get a foam and foil working using the original PCB. Going to have to replace the foam pads on that one for sure they're all pretty much a sticky black mess.
I think I'm gonna try that for my NBI-4000. I would really like to retain the PCB. I think it's doable.