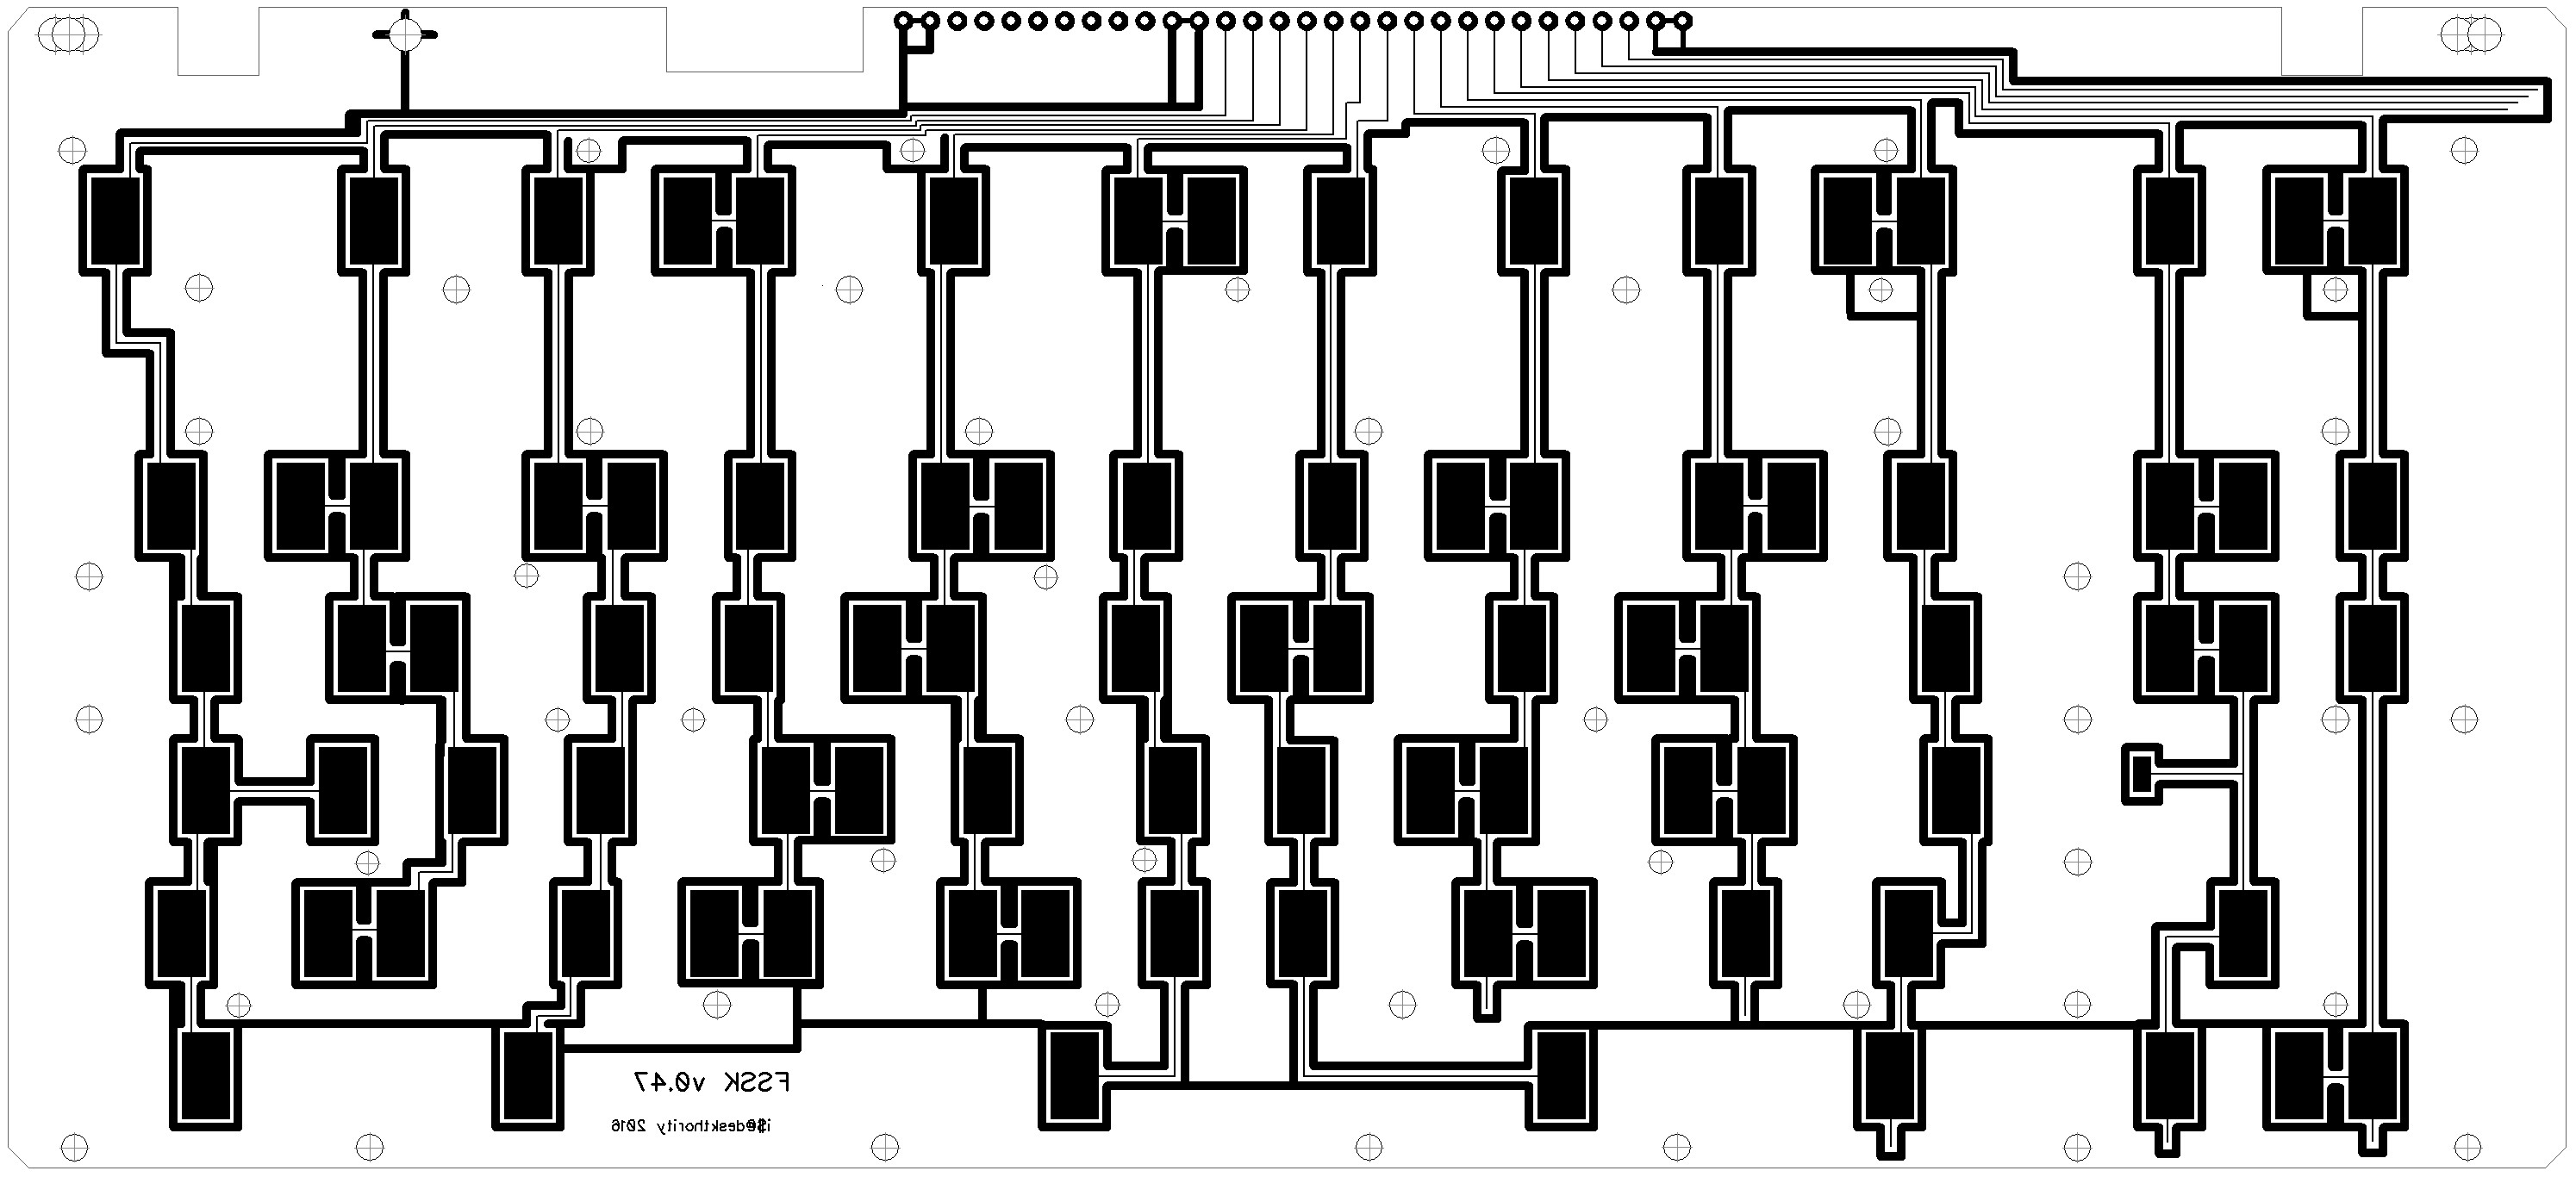
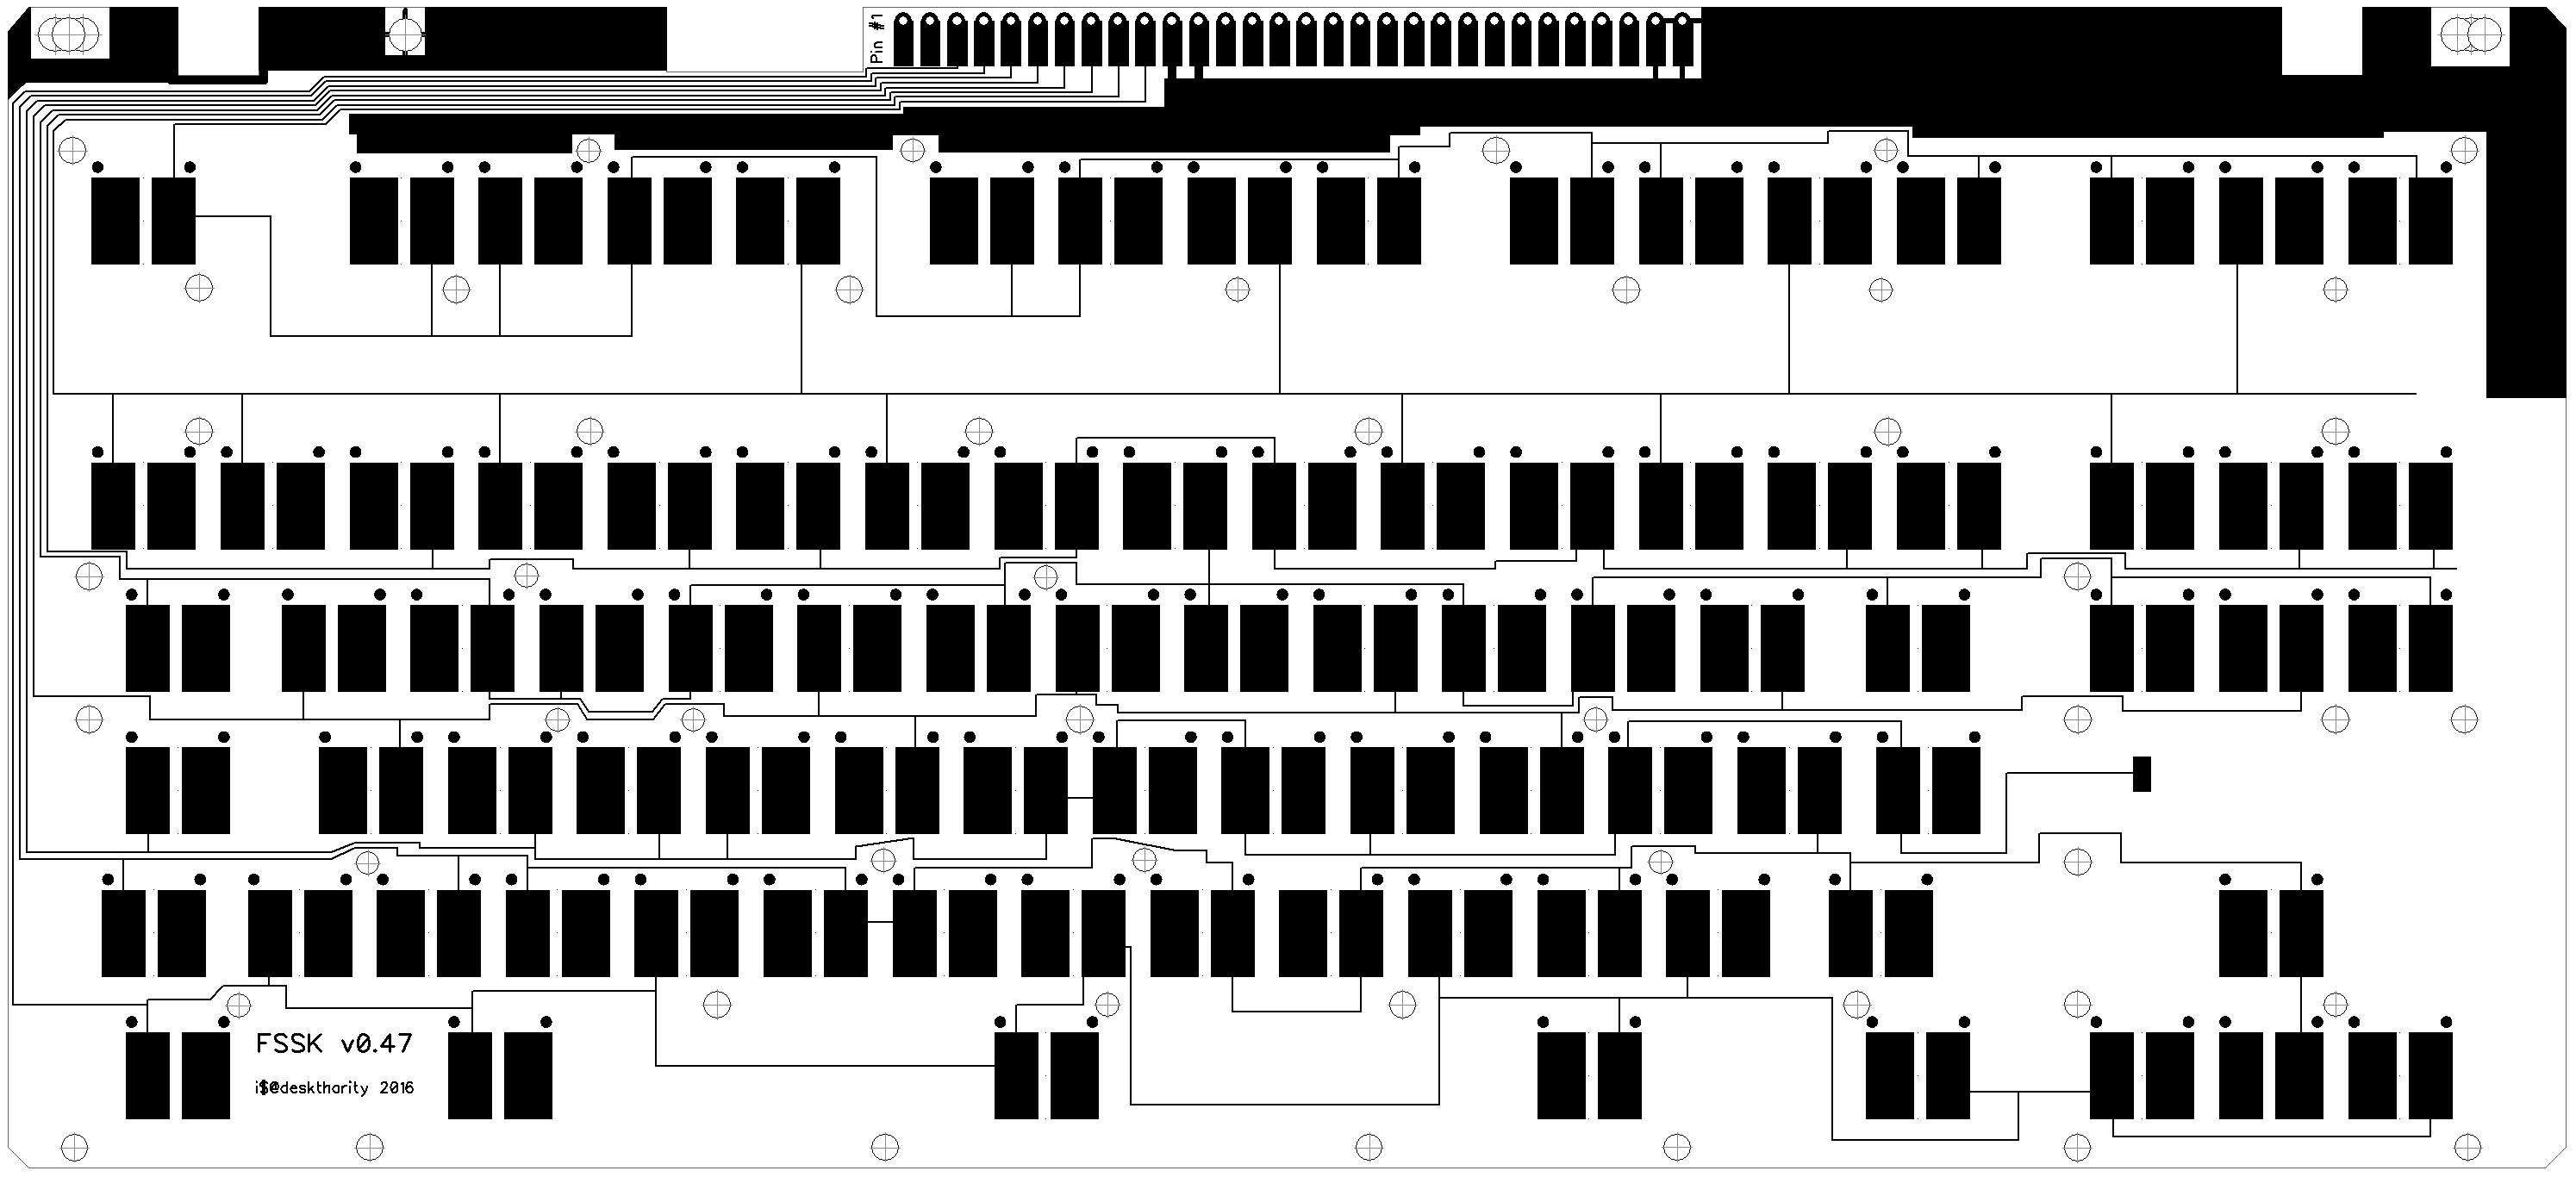
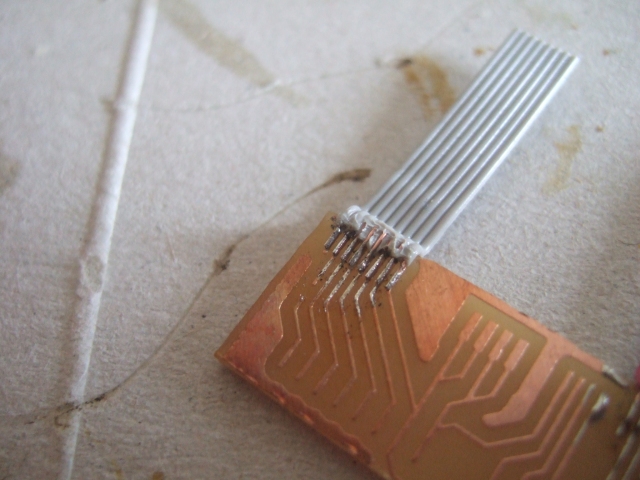
Let's create the FSSK/FEXT = DONE !!!!

User avatar
idollar
i$

05 Jan 2016, 07:09

wcass wrote: Is there room for the case bolts? The two rectangular cutouts at the top/back of the back plate.
You mean space of the case part to mount the screws. You are correct. I missed that. Actually, the connector may be in the way !
Again, your comments saved the prototype.
Immersion gold is probably overkill.
This was the only option offered to us in the web page !
Last edited by idollar on 05 Jan 2016, 07:16, edited 1 time in total.

User avatar
idollar
i$

05 Jan 2016, 07:10

__red__ wrote: That's actually a pretty good price. Who are you using?
http://www.pcbway.com/

User avatar
idollar
i$

05 Jan 2016, 07:12

Also notice that the pcb will be 0.4 mm. This means that the keyboard will be approx 0.2 mm higher than normal.
I will try a plate with this thick and test the complete set in the case before ordering.

__red__

05 Jan 2016, 11:42

idollar wrote:Also notice that the pcb will be 0.4 mm. This means that the keyboard will be approx 0.2 mm higher than normal.
I will try a plate with this thick and test the complete set in the case before ordering.
I thought the F was .8mm?

That will double your capacitance. Is that intentional?

User avatar
idollar
i$

05 Jan 2016, 12:38

__red__ wrote:
idollar wrote:Also notice that the pcb will be 0.4 mm. This means that the keyboard will be approx 0.2 mm higher than normal.
I will try a plate with this thick and test the complete set in the case before ordering.
I thought the F was .8mm?

That will double your capacitance. Is that intentional?
Yes, it is.
Bending 0.8 will be difficult.

If the prototype is to sensitive, we could always run a second test with smaller pads.

__red__

05 Jan 2016, 12:41

I've been poking my working F with an oscilloscope this morning and I'm just writing another post about it.

At least with the stock controller methodology I'm pretty sure it will make it easier to detect. The detection window is pretty short compared to the rest of the duty-cycle.

User avatar
idollar
i$

05 Jan 2016, 13:48

__red__ wrote: I've been poking my working F with an oscilloscope this morning and I'm just writing another post about it.

At least with the stock controller methodology I'm pretty sure it will make it easier to detect. The detection window is pretty short compared to the rest of the duty-cycle.
Yes, a very good idea.

The link to your post follows: http://deskthority.net/workshop-f7/alte ... 12533.html

User avatar
chzel

05 Jan 2016, 13:52

If anything, it should help the signal clear the noise floor better

User avatar
idollar
i$

05 Jan 2016, 14:17

Following the updated version 0.42 for your review:
FSSK - Diptrace v42 - top.jpg
FSSK - Diptrace v42 - top.jpg (729.98 KiB) Viewed 7617 times
FSSK - Diptrace v42 - bottom.jpg
FSSK - Diptrace v42 - bottom.jpg (811.64 KiB) Viewed 7617 times
FSSK - Diptrace v42 - both.jpg
FSSK - Diptrace v42 - both.jpg (994.97 KiB) Viewed 7617 times
And the source files:
FSSK 0.42 - Deltacad.zip
(74.66 KiB) Downloaded 184 times
FSSK v0_42 - Diptrace.zip
(162.62 KiB) Downloaded 182 times
Diptrace Gerber v0.42.zip
(146.64 KiB) Downloaded 184 times
Edit: The key design follows:
Design 0.42.jpg
Design 0.42.jpg (885.63 KiB) Viewed 7518 times
----------------
Reminder
----------------


I have created the following spreadsheet to collect the interest and contributions in this project.

Click here

Please write down your interest/preferences.
Last edited by idollar on 05 Jan 2016, 22:14, edited 1 time in total.

User avatar
wcass

05 Jan 2016, 18:00

I'm not sure you noticed that row traces and the USB connection are on opposite sides of the controller. If the USB is pointed at the cable connect hole, the row traces are on the right.

You can flip the controller around and point the USB connector to the right, but make sure you have room. Or we could use __red__'s controller - but then we would want to change the trace spacing and connection method - and we would be testing two things at the same time.

User avatar
idollar
i$

05 Jan 2016, 19:22

wcass wrote: I'm not sure you noticed that row traces and the USB connection are on opposite sides of the controller. If the USB is pointed at the cable connect hole, the row traces are on the right.

You can flip the controller around and point the USB connector to the right, but make sure you have room. Or we could use __red__'s controller - but then we would want to change the trace spacing and connection method - and we would be testing two things at the same time.
Yes, I have noticed it.

The problem is that the columns for the FEXT (Extended) shall leave on the right of the PCB, towards the numpad. If I order the PADs the way around, the amount of column traces will increase at the top of the PCB as they have to cross all the top area, making impossible to route the row traces. It was already very difficult to route the left-top part of the PCB to accommodate the holes.This is why I took this decision.

There is no need to flip the controller. If we use a ribbon cable, it could be soldered with the controller pads pointing to the centre of the case. The USB plug will still point to the right side, but a longer USB cable will do.

We will need a solution to secure the USB cable. The connector is very weak and will break in this position if we do nothing.

User avatar
chzel

05 Jan 2016, 19:31

Perhaps a zip tie around the right screw post would be enough. It will make the cable inside quite long, but it will be secure. Or a P-clip, but that would leave the case gaping a bit.

User avatar
wcass

05 Jan 2016, 20:00

maybe just go with a long USB for this early test and if all works well enough, re-design a controller with a USB plug at the proper spot. A standard USB-B plug would fill most of the hole. It would be nice to change the ribbon cable pitch to something easier to source.

User avatar
idollar
i$

05 Jan 2016, 20:47

actually I wanted to design a plastic piece, similar to the original part in the original controller, presenting the connector outside the box. It could be 3D-printed. My idea was to cut it in the middle to allow the USB cable though. One could glue the two parts together with the cable. This will secure the set (cable and controller).

It should not be very difficult to design. Any volunteer ? :-)

User avatar
wcass

05 Jan 2016, 22:13

idollar wrote:
wcass wrote: immersion gold is probably overkill.
This was the only option offered to us in the web page !
There should have been an option for "Surface Finish: HASL with lead, HASL lead free, immersion gold ...."
I would have said to select "Vias not covered" (because you don't have any vias), but it looks like they give you "Tented vias" for free.

The PCB will replace the bottom membrane (5 mil), separator membrane (5 mil), top membrane (3 mil), and rubber membrane (10 mil) - for a total of 23 mil (which is pretty close to 0.6mm).

As 4mm/0.156" pitch ribbon cable is so difficult to find, you might change the connector to use 2.54mm/0.1" pitch (same at what M uses). Also, I would suggest - go to surface pads (all on top) instead of through hole. That will reduce the chance that something could short out against the bottom plate.

User avatar
idollar
i$

05 Jan 2016, 22:24

wcass wrote:
idollar wrote:
wcass wrote: immersion gold is probably overkill.
This was the only option offered to us in the web page !
There should have been an option for "Surface Finish: HASL with lead, HASL lead free, immersion gold ...."
Also, for "Via process", select "Vias not covered". You don't have any vias.
I want to use the rubber membrane UNDER the PCB, if not the sandwich will be too rigid and the flippers may not work fine.
Thus we need to use 0.4 mm. This will also help with the bending. Think that the top is not metalic and is more than 30 years old !

I can select vias not covered, but the only option offered for 0.4 mm is immersion gold. All other options are dissabled when 0.4 is selected.
The PCB will replace the bottom membrane (5 mil), separator membrane (5 mil), top membrane (3 mil), and rubber membrane (10 mil) - for a total of 23 mil (which is pretty close to 0.6mm).
Above.
As 4mm/0.156" pitch ribbon cable is so difficult to find, you might change the connector to use 2.54mm/0.1" pitch (same at what M uses). Also, I would suggest - go to surface pads (all on top) instead of through hole. That will reduce the chance that something could short out against the bottom plate.
There is no space for any connector inside the case. I plan to solder the cable directly into the PCB. From there I plan to go to the controller, placed in the space used by the original one. I may use a connector in the middle, below the metal plate, to allow better testing.

There is no space for a connector.

Please, comment. All your comments are very good. Do not hesitate to contradict me.

User avatar
chzel

05 Jan 2016, 22:30

I think wcass means to use wire on pcb directly, just surface mount on the top layer with no chance to short to the plate.

I'm not sure if the rubber mat is needed, after all F's don't have any.

User avatar
idollar
i$

05 Jan 2016, 22:34

I have forgotten to mention that at least one pad shall connect the top and bottom ground layers.

User avatar
idollar
i$

05 Jan 2016, 22:36

chzel wrote: I'm not sure if the rubber mat is needed, after all F's don't have any.
All Fs have foam between the barrels and the top metal plate. This soft part ensures that the barrels are well placed against the PCB. The top plate in this case cannot have any foam. And the rubber will disappear between the flippers and the membrane (PCB). We will need something soft below the PCB, I guess.

User avatar
chzel

05 Jan 2016, 22:47

If I understand the design of the F correctly the foam is there to ensure that there is consistent pressure of the barrels to the PCB. In our case the bolts/screws will provide that uniformity. I worry that the rubber will dampen a lot of the F "click".

User avatar
Techno Trousers
100,000,000 actuations

06 Jan 2016, 00:28

I'm actually not sure why the foam is there in the F; maybe for sound deadening? The F-122s I've worked with have an excellent and rigid slide-together mounting of the top and bottom plates, and that's more than sufficient to keep everything in place. I know Fohat has said that he's used an F-122 without any foam at all, and it worked fine.

I think I'd go with wcass' suggestion of a .6mm PCB and forego the rubber altogether. I plan to use the earlier suggestion of plastic rather than metal bolts, which can be individually adjusted as necessary for proper tension. And we could possibly use thin rubber washers on the back side of the PCB as well, if necessary for cushioning.

User avatar
micrex22

06 Jan 2016, 00:38

Interesting, I put F AT back together without the foam and it definitely did not work (it rendered all of the springs unable to buckle). Soon as I put the foam back in, then all of the switches would properly buckle again... Perhaps it varies between Model Fs, I've always assumed the foam was for alignment: it's definitely needed on an F AT. In the case of the FSSK it wouldn't need a foam layer for alignment since the pre-molded Model M barrels are designed at a curve without requiring alignment on a hard metal surface.

Supposedly the clear plastic film that covers the rear metal and PCB has something to do with the capacitance sensing, but I can't verify this as I've never omitted the plastic layer on a Model F before to see what happens.

--

Hey iDollar, how much will shipping be to Canada for the prototypes? If customs will be too much of a hassle, I'll skip out on the prototypes (sigh) and instead opt for another production board.

User avatar
wcass

06 Jan 2016, 03:30

I think it would be OK to go with either 0.6 or 0.4 as the difference is so small. The 0.6 would definitely be more cost effective and also more durable than 0.4. Try it with and without the rubber on the back.

As for the cable connection, i was suggesting something like this ...
Image
That ribbon cable pictured is 0.025" patch, and i would suggest using 0.1, so imagine that but 4x the spacing. And just that on the board side. The controller side would fan out and use standard through hole wiring until __red__ or I redesign the xwhatsit with a USB connection in the right spot (removable cables are best!).

Another option would be to use "Z conductive tape" and FFC
The cable would be 3 like this ...
http://www.digikey.com/product-detail/e ... ND/4427130
And the controller side would connect with 3 like this ...
http://www.digikey.com/product-detail/e ... ND/1003094
And the attachment to switch matrix would use 3 (4mm x 11mm) pieces of this ...
https://www.sparkfun.com/products/retired/12042

User avatar
idollar
i$

06 Jan 2016, 09:57

This modified version should allow both proposed options. Let me know your comments:
Layers v0.43.jpg
Layers v0.43.jpg (333.27 KiB) Viewed 7541 times
FSSK - Diptrace v43 - both.jpg
FSSK - Diptrace v43 - both.jpg (966 KiB) Viewed 7541 times
FSSK - Diptrace v43 - bottom.jpg
FSSK - Diptrace v43 - bottom.jpg (794.29 KiB) Viewed 7541 times
FSSK - Diptrace v43 - top.jpg
FSSK - Diptrace v43 - top.jpg (691.18 KiB) Viewed 7541 times
The pads shall cross the PCB to allow the bottom layer to be connected.
Also notice that the first and second pins are not grounded on the top layer. The connection to the ground is done through the bottom side.

User avatar
idollar
i$

06 Jan 2016, 11:01

I realised that:

1) the ground line in the bottom side, top-right is isolated. We need to connect it to the ground on the top side.
2) We could have a modular approach to the FEXT - (number-pad)

One could build an interface to the number pad zone of the FEXT. This will allow to extend the above displayed PCB with an additional smaller board covering the number pad only. This will require the column and rows traces to be presented as a connector in both, the main PCB and the PAD board. This approach will also help in the testing phase.

I need to think about the bullet 2) above.

User avatar
idollar
i$

06 Jan 2016, 22:04

Further to the bullet 2) above, have created the following version 0.45 but I am still not convinced. We may want to take away the "connector" between the areas.
I guess that soldering a cable between the two PCBs (FSSK and NUMPAD) between the plates will not be possible.

Note that the holes in the board limits the position of the potential "connector" pads.
Note also that the "connector" shall be in the bottom side to allow for the mounting once the flippers are in place. It would be impossible to flip the two PCB parts together if the soldering is done on the top.

Again, I do not think this is a good idea, but it was worth check in it.

Let me know your comments
top.jpg
top.jpg (121.05 KiB) Viewed 7473 times
bottom.jpg
bottom.jpg (90.13 KiB) Viewed 7473 times
both.jpg
both.jpg (136.2 KiB) Viewed 7473 times
The good news is that I have completed and reviewed the FEXT extension during the process:
Design 0.45.jpg
Design 0.45.jpg (428.61 KiB) Viewed 7473 times

User avatar
idollar
i$

06 Jan 2016, 23:22

This is the alternative for the FEXT without the connector between the areas. My preference.
Simpler and smaller. If this is selected, there will be FSSK PCB version and a different FEXT PCB version.


Please comment
FSSK - Diptrace v46 - top B.jpg
FSSK - Diptrace v46 - top B.jpg (511.47 KiB) Viewed 7438 times
FSSK - Diptrace v46 - bottom B.jpg
FSSK - Diptrace v46 - bottom B.jpg (548.29 KiB) Viewed 7438 times
FSSK - Diptrace v46 - both B.jpg
FSSK - Diptrace v46 - both B.jpg (699.06 KiB) Viewed 7438 times
Note (@wcass ;-) )- I need to review again the rows on the numpad to ensure that all the rows cross the columns one time.

__red__

07 Jan 2016, 09:59

wcass wrote: I'm not sure you noticed that row traces and the USB connection are on opposite sides of the controller. If the USB is pointed at the cable connect hole, the row traces are on the right.

You can flip the controller around and point the USB connector to the right, but make sure you have room. Or we could use __red__'s controller - but then we would want to change the trace spacing and connection method - and we would be testing two things at the same time.
Prototype order for my initial swag at the controller is in fabrication. Should have it back in about 14 days.

That's 2 weeks for me to experiment with ADCs and probably discover what everyone else knows to be impossible anyways.

User avatar
idollar
i$

07 Jan 2016, 14:48

All,

I know that you may be already tired of my posts with the changes that I have been doing to the PCB.
I only hope that this will be the final post with the FSSK prototype layout with is already in its version v0.47 !!!

The changes in this version, which will as I said hopefully the latest one, are:
  • 1.- I realised by looking at the gerber files that the mounting holes on the top part of the PCB were not oval. This would have meant manual cutting of the PCB to allow the montage. Diptrace does not offer oval holes, or at least I could not find how to do it. The solution was to add three holes in a row. This trick should do the job.

    2.- I have reviewed the space between the upper and bottom layers to check if there was room to make the holes bigger. This will minimize the risk of misalignment with the real keyboard. I have checked it with printouts, but believe me, it is tricky. Just the fact of presenting the printout on to the wrong side of the metal plate makes a difference !

    3.- I discarded the idea of having a module for the numpad that could be linked to the FSSK. Soldering the interface that I have shown before will be impossible, not to say that the holes will get in the middle. We will stick to the original idea of having two different versions of the PCB.

    4.- I have closed the ground lines in the bottom side when the numpad is not present. This will improve the grounding which is critical for the success.

    5.- I have changed a couple of upper traces which were routed close to the middle holes. I have used "incline" traces to move as far as possible from the bottom layer and the holes.

    6.- I also checked the price for 0.6 mm instead of 0.4 mm PCBs. For 10 units, the different is approximately $100 extra on top of the $180 that the 0.6mm will cost. We will order 0.6mm. Additional to this we will have to pay some import duties that I estimate to be some 20 euros.
The order is waiting review from the producer. So hurry up if you want to contribute to the prototyping phase !!!!

Regarding the contribution to the prototyping:

I have sent an email to the people the have shown some interest proposing ordering 5 units instead of the 10 that I originally proposed. If the design works fine, I proposed to run a lottery among the contributors. The winner would have gotten the prototypes after paying the additional shipping cost.

With the new (estimated) price for the 0.6mm this will not be longer required. Thus, we discard this proposal and stay with the 10 units. As we are very close to the purchasing, please register today using a PM to me. I will answer back with the paypal details to transfer your contribution: (180+20)/8 = 25 euros.

In the above you can read that I have added the import taxes and assumed that euros and dollars are the same. This will add some extra cost, but it will also cover some of the interested contributors that may drop out.
Note that if the PCB works, in order to get it in your place, you will need to add some local shipping costs on top.

Alright, following the files:
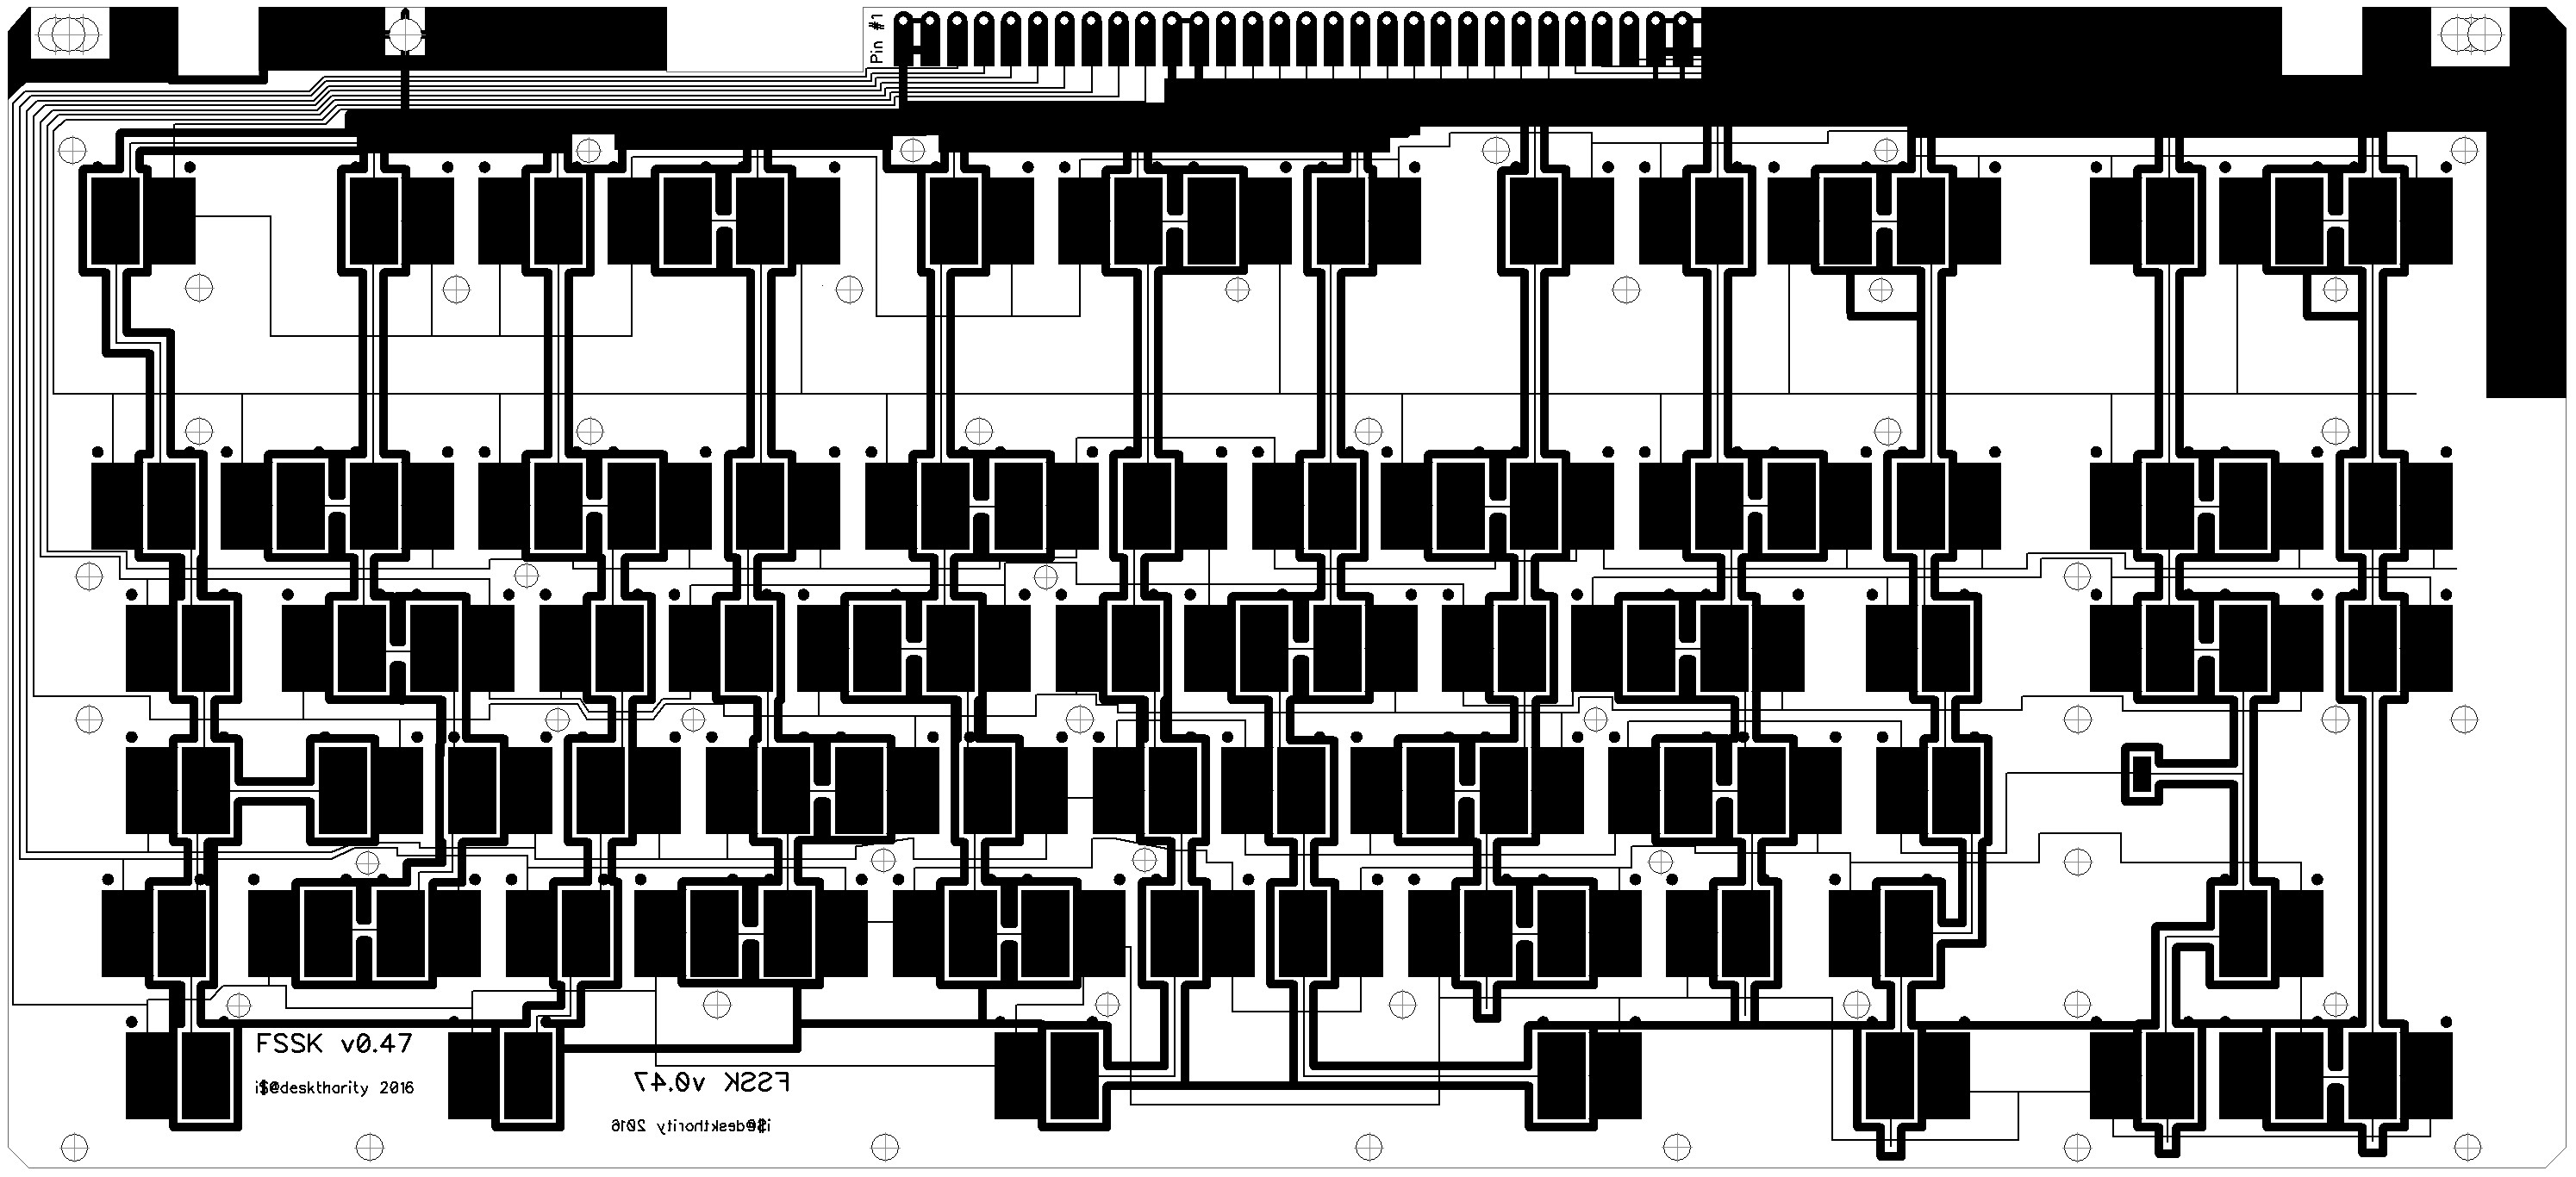
FSSK - Diptrace v0_47 - both.jpg
FSSK - Diptrace v0_47 - both.jpg (594.01 KiB) Viewed 7389 times
FSSK - Diptrace v0_47 - bottom.jpg
FSSK - Diptrace v0_47 - bottom.jpg (462.19 KiB) Viewed 7389 times
FSSK - Diptrace v0_47 - top.jpg
FSSK - Diptrace v0_47 - top.jpg (439.03 KiB) Viewed 7389 times
Deltacad file:
FSSK 0.47 - Deltacad.zip
(75.88 KiB) Downloaded 159 times
Diptrace file:
FSSK v0_47 - Diptrace.zip
(158.79 KiB) Downloaded 164 times
And Gerber sent to the producer:
Diptrace FSSK v0.47 - For order.zip
(104.4 KiB) Downloaded 177 times


----------------
LAST Reminder ?
----------------


I have created the following spreadsheet to collect the interest and contributions in this project.

Click here

Please write down your interest/preferences. And send me a PM.

User avatar
hammelgammler
Vintage

07 Jan 2016, 16:39

Just send you a PM about the order.


Sadly I realized that I need about 10-15 F flipper to have enough for two FSSK's, I think 10 should be alright though, and 15 would defnitly be enough.
Does anyone have about 10 extra flippers that they wouldn't need? That would be great! :)

Post Reply

Return to “Workshop”