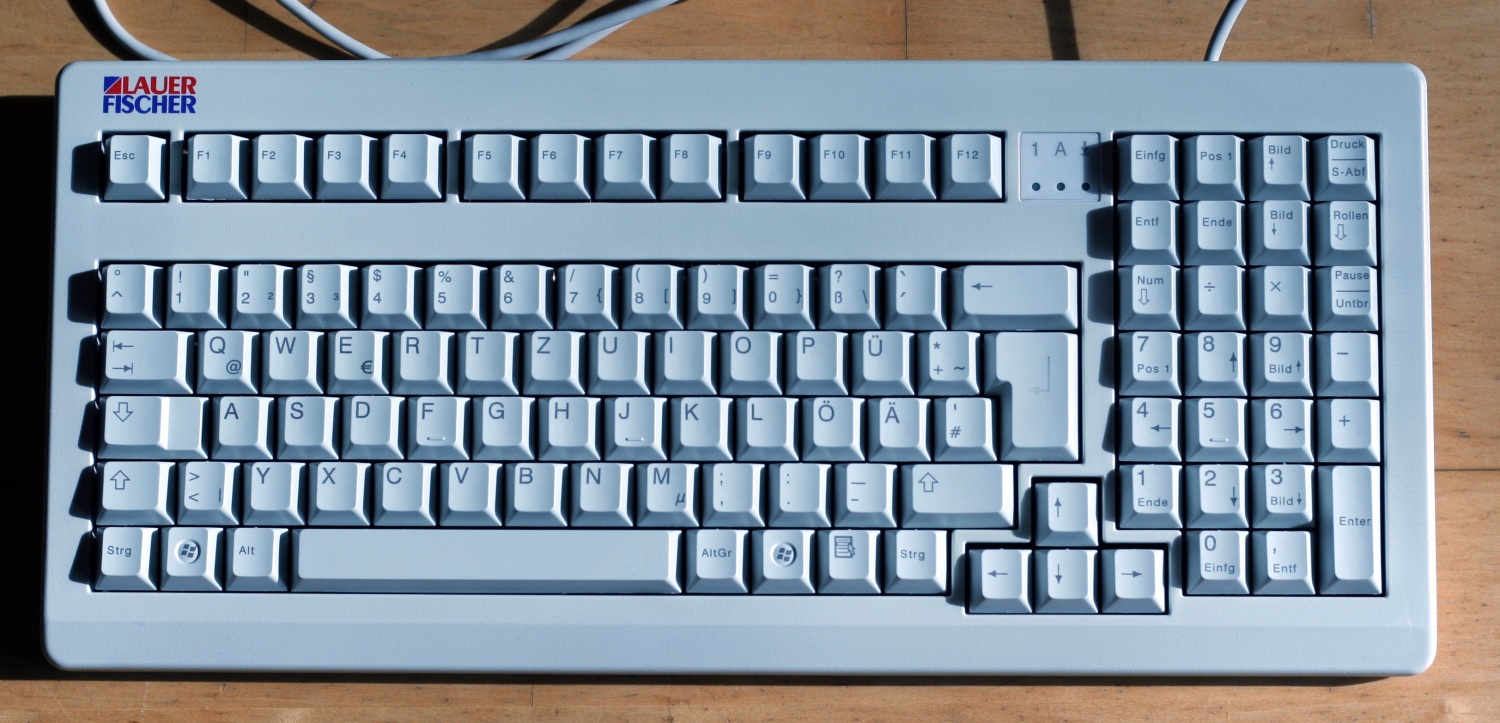
Cleaning of a very nasty G80-1800
- Lustique
- Location: Germany
- Main keyboard: G81-3424LPNDE-0/00
- Main mouse: Kensington Orbit Scroll Ring Trackball
- Favorite switch: Buckling Cherry MY bruewck
- DT Pro Member: -
Hi,
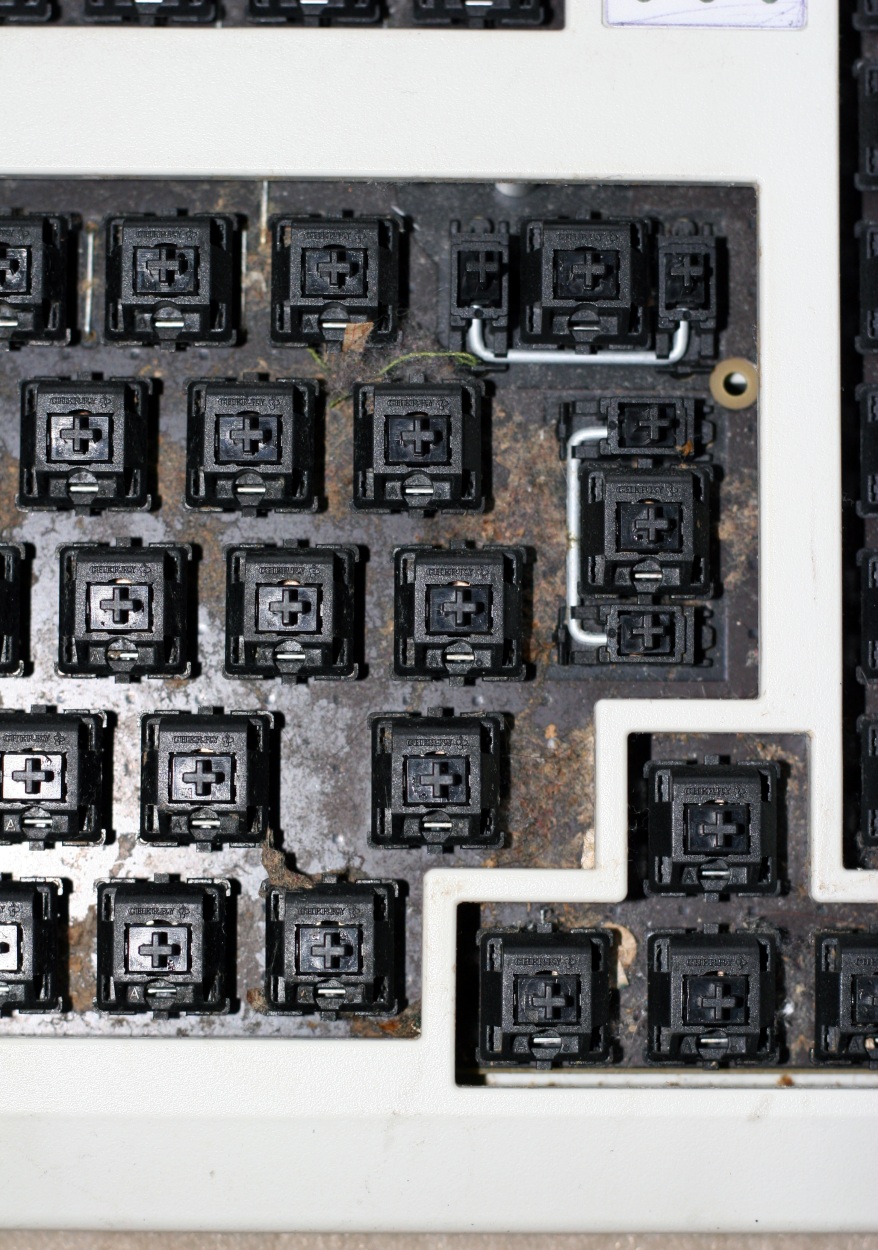
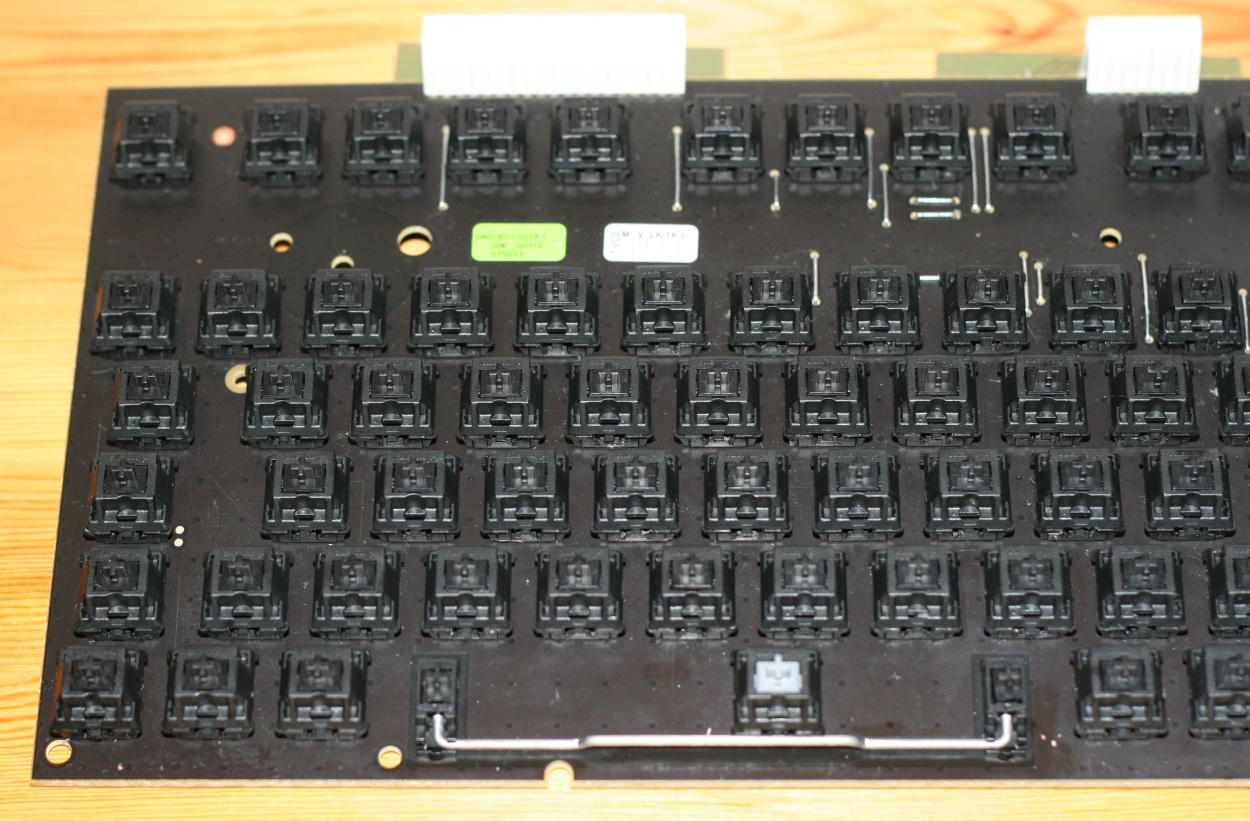
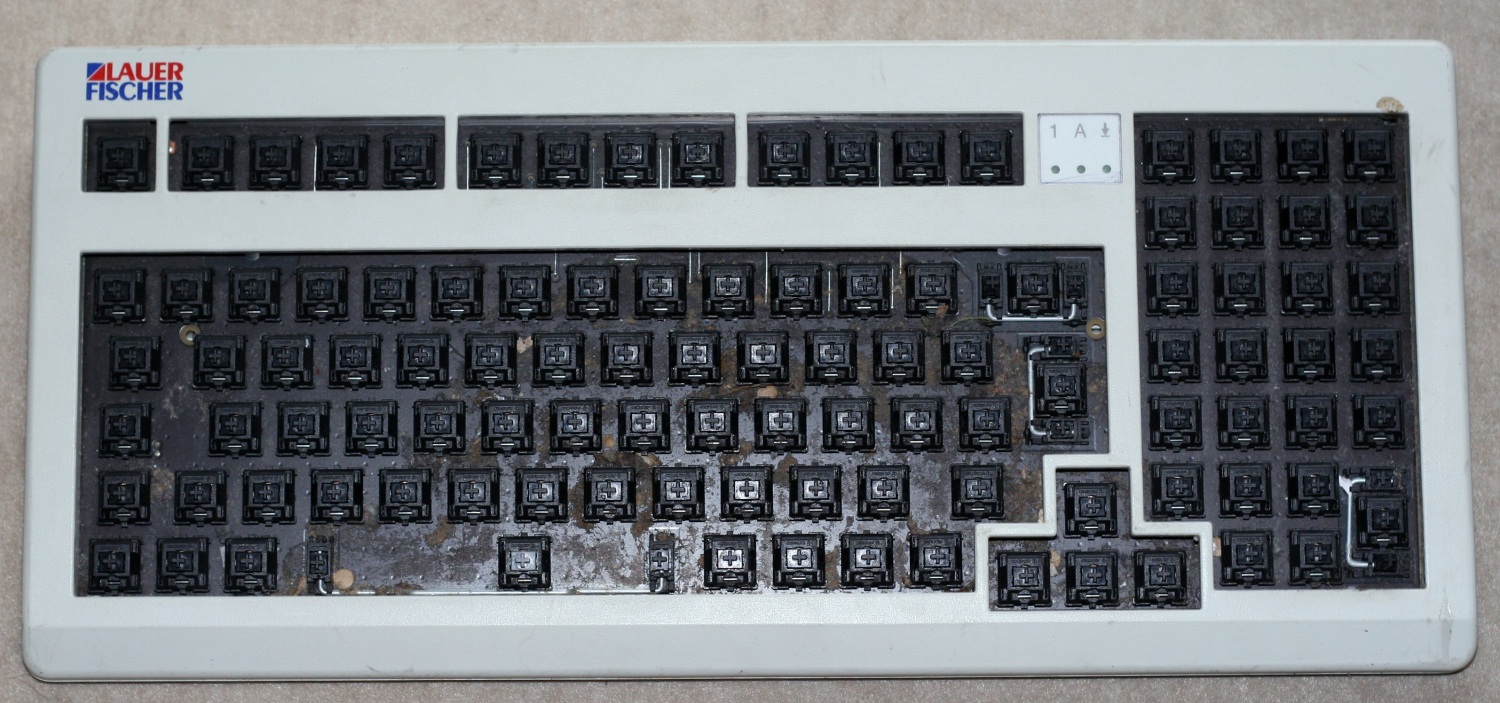
I have got a problem with a really dirty G80-1800: I don't have a clue on how to get this thing clean. I already cleaned two boards, but the dirt there was mostly dust, but this time it is way more nasty. I suspect dust + coffee/coke or something, which somehow transformed into a cement-like substance in some places on the PCB. It could also be something else entirely, since the board is from a pharmacy, I suppose, but I somehow feel more comfortable in believing it's just some beverage that was spilled there...
Below is a picture of the PCB with the switches. The caps are already experiencing their 4th (or 5th) hour-long bath in washing-up liquid and will spend the night with some lovely dental cleaning tabs, but I don't have a clue concerning the cleaning of the PCB and the switches. Any suggestions?
Btw: I already vacuumed it before I took the photo, so some of the big chunks are already gone. Oh, and if Ascaii happens to see this thread: That is the white G80-1800 you sent me, you already warned me about.
- Attachments
-
- The board in question. It's just nasty, really.
- G80-1800_PCB_switches.JPG (377.59 KiB) Viewed 8048 times
- Spharx
- Location: Germany
- Main keyboard: Leoplod FC200R
- Main mouse: DeathAdder
- Favorite switch: MX Brown
- DT Pro Member: -
Looks like you will need a toothbrush for this one after you desoldered the switches. Way to much work for this cheap keyboard. I would harvest the switches and throw it in the trash.
- Lustique
- Location: Germany
- Main keyboard: G81-3424LPNDE-0/00
- Main mouse: Kensington Orbit Scroll Ring Trackball
- Favorite switch: Buckling Cherry MY bruewck
- DT Pro Member: -
Well, that really is not the answer I was looking for. I cannot solder for shit (probably).Spharx wrote:Looks like you will need a toothbrush for this one after you desoldered the switches. Way to much work for this cheap keyboard. I would harvest the switches and throw it in the trash.
So there is no other way?
↓↓↓ I think I once read that you could bathe the whole PCB, at least a PCB from a Tipro. ↓↓↓
Is this also possible with a cherry PCB and PCB-mounted switches?7bit wrote:Take it apart.Icarium wrote:So I bought a Tipro on ebay.
Does anybody have advice on how to clean it?
Both the case and the keys look pretty nasty.
If you have general advice for some sort of plastic it would be good if you could also tell me how to figure out which plastic it is.
Take the controller off. I had no tests cleaning the controller yet.
You can now clean the keyfield part (the black heavy thing with the switches on the upper side and the green plate at the underside) under warm water with Pril (I did not test other cleaning stuff). Let it dry for 3 days.
Shell:
there exist 2 different cases.
Normal plastic ones: just clean the same way as the keyfield.
Rough-plastic painted ones: be careful not to rub off the paint!
I did not yet test the Dishwasher. I think it is better to shrub it under the water tab than putting it into the dishwasher.
ps: Post a picture of it!
But I would probably have to take the controller thingy off as well, which would require desoldering, I think, right?
-
- Location: Stockholm, Sweden
- DT Pro Member: 0011
The dishwasher is only for rubber dome keyboards.
I remember a thread on geekhack where sixty describes how he had cleaned an old keyboard that was just as dirty, by first desoldering the switches.
I think that you will have to desolder only where the keyboard is the dirtiest and the crud has seeped under the switches.
If it doesn't smell or looks too icky, I think that you could just leave it.
Last edited by Findecanor on 16 Feb 2012, 21:39, edited 1 time in total.
- Lustique
- Location: Germany
- Main keyboard: G81-3424LPNDE-0/00
- Main mouse: Kensington Orbit Scroll Ring Trackball
- Favorite switch: Buckling Cherry MY bruewck
- DT Pro Member: -
I didn't want to use a dishwasher, I only thought about cleaning it like 7bit describes above, by hand with some washing-up liquid. And he mentions he did this with a Tipro and these have MX black switches, don't they?
So there is no way of cleaning it properly (even if it is not sticky or smells, I'm kind of picky when it comes to things like this) without some (de)soldering, which I have never done before?
I also thought about some steam cleaning. Is this possible or would it melt/deform the plastic (PCB and switches)? This would at least be a drier method than actually bathing the whole PCB and it would potentially make this board kind of germ-free (well, at least almost)...
- Lustique
- Location: Germany
- Main keyboard: G81-3424LPNDE-0/00
- Main mouse: Kensington Orbit Scroll Ring Trackball
- Favorite switch: Buckling Cherry MY bruewck
- DT Pro Member: -
Yes, I am aware of that, but Spharx and Findecanor mentioned the desoldering of switches. I think if I only had to desolder, I don't know, 5 soldering points, to get the controller off and that's it, I think that even I would be able to do this. But other than that, would the "7bit-method" also work with my Cherry board? And how do you actually get the controller off of a G80-1800? Is it possible to get these broad cables (white) off without breaking anything? Has anyone here experience with that?Minskleip wrote:Lustique, 7bit took the controller off his Tipros first.
- Spharx
- Location: Germany
- Main keyboard: Leoplod FC200R
- Main mouse: DeathAdder
- Favorite switch: MX Brown
- DT Pro Member: -
Even if 7bit he removed the controller there are still some IC's at the bottom of the pcb. Gold wont rust but I am not really sure about the springs,solder-connections and the rest of all the metal that may or may not be in there.
If you let it dry it in a oven at low temperatures ... well that idea really sounds bad ... maybe the water wont have the time to react.
You should just ask him if his Tipro still works after some days have passed now.
If you let it dry it in a oven at low temperatures ... well that idea really sounds bad ... maybe the water wont have the time to react.
You should just ask him if his Tipro still works after some days have passed now.
- 7bit
- Location: Berlin, DE
- Main keyboard: Tipro / IBM 3270 emulator
- Main mouse: Logitech granite for SGI
- Favorite switch: MX Lock
- DT Pro Member: 0001
You must be a bit more careful with not shrubbing off the switches. Looking at the keyboard with the controller being separate, it should be no problem to do it the wild way (electronic-wise).Lustique wrote:Yes, I am aware of that, but Spharx and Findecanor mentioned the desoldering of switches. I think if I only had to desolder, I don't know, 5 soldering points, to get the controller off and that's it, I think that even I would be able to do this. But other than that, would the "7bit-method" also work with my Cherry board? And how do you actually get the controller off of a G80-1800? Is it possible to get these broad cables (white) off without breaking anything? Has anyone here experience with that?Minskleip wrote:Lustique, 7bit took the controller off his Tipros first.
My Tipro still works and the switches do not sound rusty. Oven is a good idea ...Spharx wrote:Even if 7bit he removed the controller there are still some IC's at the bottom of the pcb. Gold wont rust but I am not really sure about the springs,solder-connections and the rest of all the metal that may or may not be in there.
If you let it dry it in a oven at low temperatures ... well that idea really sounds bad ... maybe the water wont have the time to react.
You should just ask him if his Tipro still works after some days have passed now.
IMPORTANT:
This method does not work for buckling spring keyboards and is not tested for switches other than Cherry MX.
- Lustique
- Location: Germany
- Main keyboard: G81-3424LPNDE-0/00
- Main mouse: Kensington Orbit Scroll Ring Trackball
- Favorite switch: Buckling Cherry MY bruewck
- DT Pro Member: -
Well, as I have just learned yesterday (?), the controller seems to be soldered directly to the pcb, so there's no chance in hell for me to get the controller off, considering my non-existent soldering skills. I could only take off the USB cable, as it was only "plugged" into the controller. It seems I will try this with the controller attached. Well, if I blow this, I at least have a white replacement USB cable (cable modding, yay! ) .7bit wrote:You must be a bit more careful with not shrubbing off the switches. Looking at the keyboard with the controller being separate, it should be no problem to do it the wild way (electronic-wise).Lustique wrote:Yes, I am aware of that, but Spharx and Findecanor mentioned the desoldering of switches. I think if I only had to desolder, I don't know, 5 soldering points, to get the controller off and that's it, I think that even I would be able to do this. But other than that, would the "7bit-method" also work with my Cherry board? And how do you actually get the controller off of a G80-1800? Is it possible to get these broad cables (white) off without breaking anything? Has anyone here experience with that?Minskleip wrote:Lustique, 7bit took the controller off his Tipros first.
[...]
Last edited by Lustique on 27 Feb 2012, 18:29, edited 1 time in total.
- Lustique
- Location: Germany
- Main keyboard: G81-3424LPNDE-0/00
- Main mouse: Kensington Orbit Scroll Ring Trackball
- Favorite switch: Buckling Cherry MY bruewck
- DT Pro Member: -
I have just steam cleaned the pcb incl. switches. Right now it looks rather promising, although I may have to do one more run, since the cement became some kind of goo and somehow managed to fly from one switch to another. A wet-dry vacuum cleaner would have been perfect. Being only able to blow things around, well, blows.
It looks almost clean, but I have to check back once everything is totally dry again. I will post pics when it's done, though (of the process itself and of the finished product), at least if someone is interested.
- Lustique
- Location: Germany
- Main keyboard: G81-3424LPNDE-0/00
- Main mouse: Kensington Orbit Scroll Ring Trackball
- Favorite switch: Buckling Cherry MY bruewck
- DT Pro Member: -
Well, it's done.
The steam cleaning of the PCB went great. It seems the procedure did not damage the PBC at all and after reassembling, I tested the keyboard, i.e. typed every key to see whether it registers or not, and there seem to be no problems, as well.
But one problem persists: The switches still are sticky, or a least a lot of them. I opened the ones that felt strange when pressing down the sliders and applied some silicon based lubricant to the slider via a cotton bud, but it seems that this didn't help as much as I hoped for. As the switches were sticky before, I don't know, whether the stickiness is related to the steam cleaning in any form, but as the steam went everywhere, since I also used it as some kind of canned air on steroids to remove dust, and because some switches are absolutely fine (namely the ones that were clean beforehand, like the function row or the upper part of the numpad), I don't blame the stickiness on the steam. I think it can be considered variable weight now.
Conclusion: It's clean, but typing on it isn't really a pleasure.
I will post some pictures later, probably tomorrow, where you can see the finished product and the amount of dirt I got off of the keyboard.
Well, a message to the pharmacist that abused the board like this:
I hope you burn in hell for all eternity you motherf...
(I typed this post on the board in question, by the way. )
- Lustique
- Location: Germany
- Main keyboard: G81-3424LPNDE-0/00
- Main mouse: Kensington Orbit Scroll Ring Trackball
- Favorite switch: Buckling Cherry MY bruewck
- DT Pro Member: -
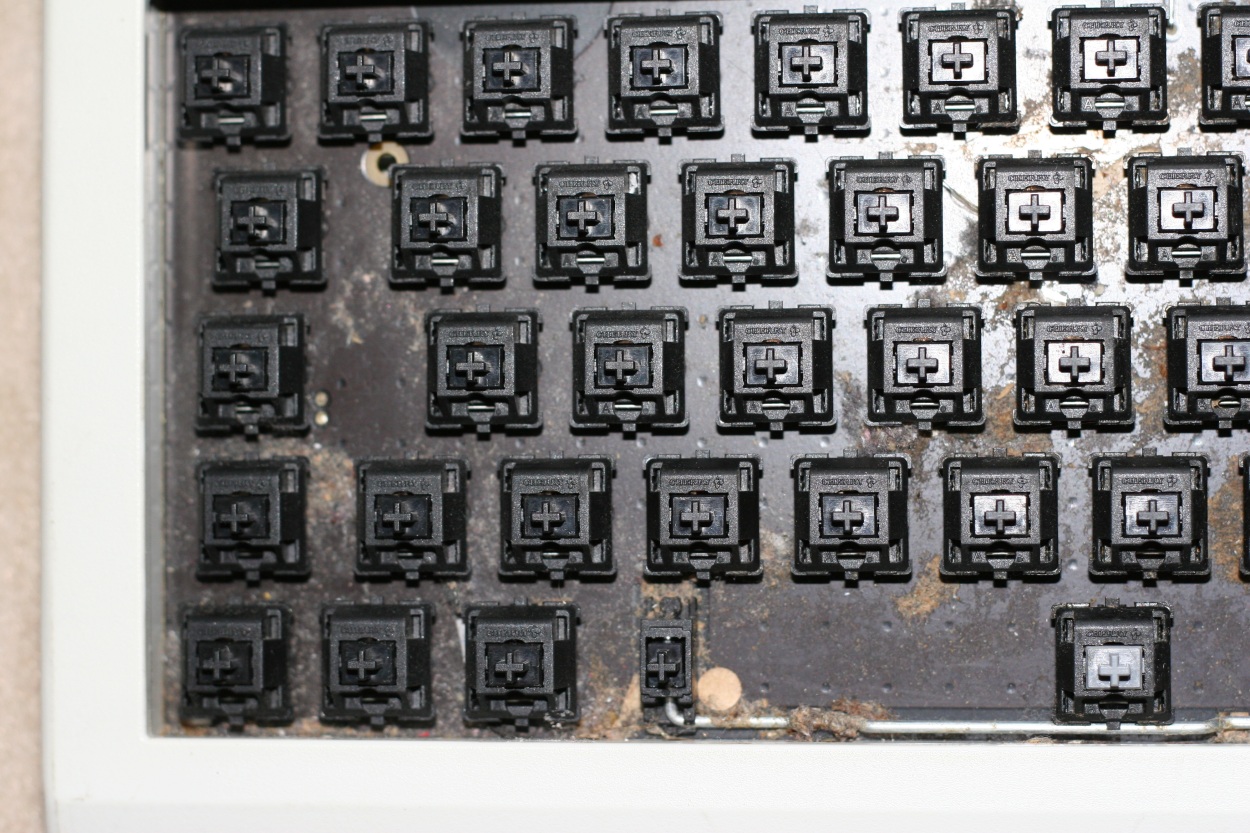
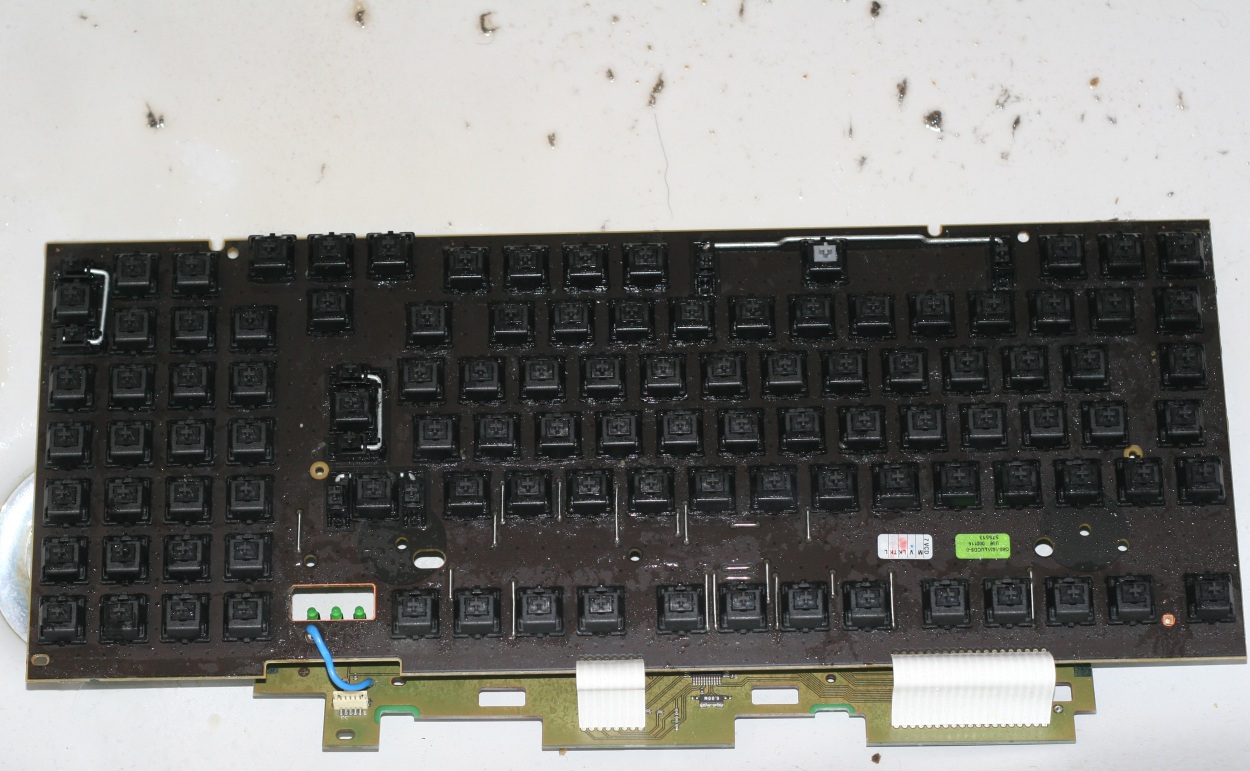
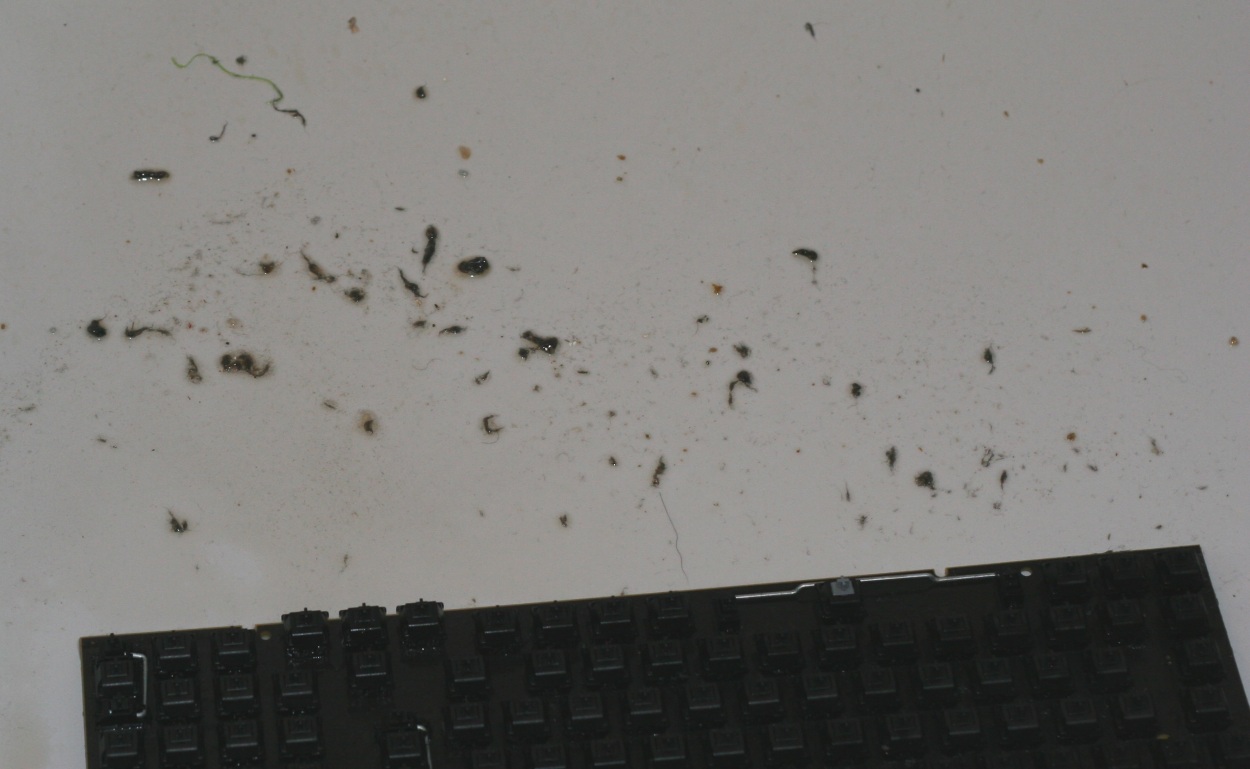
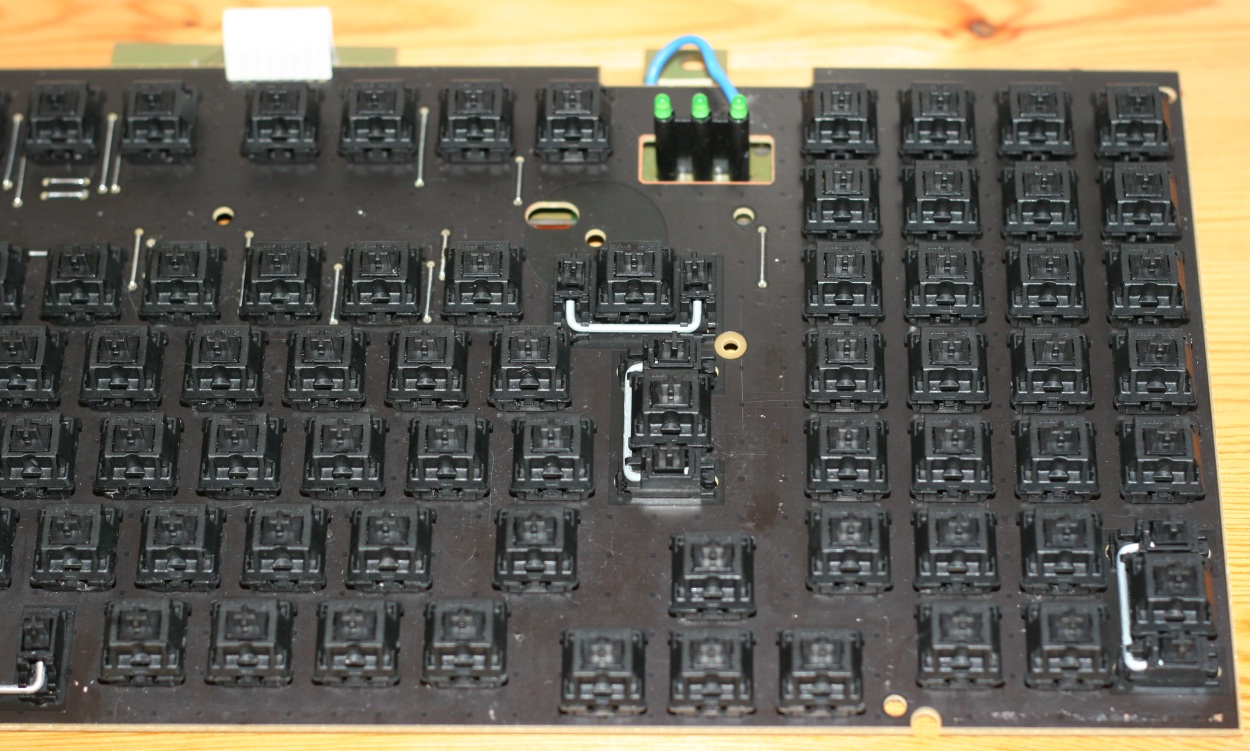
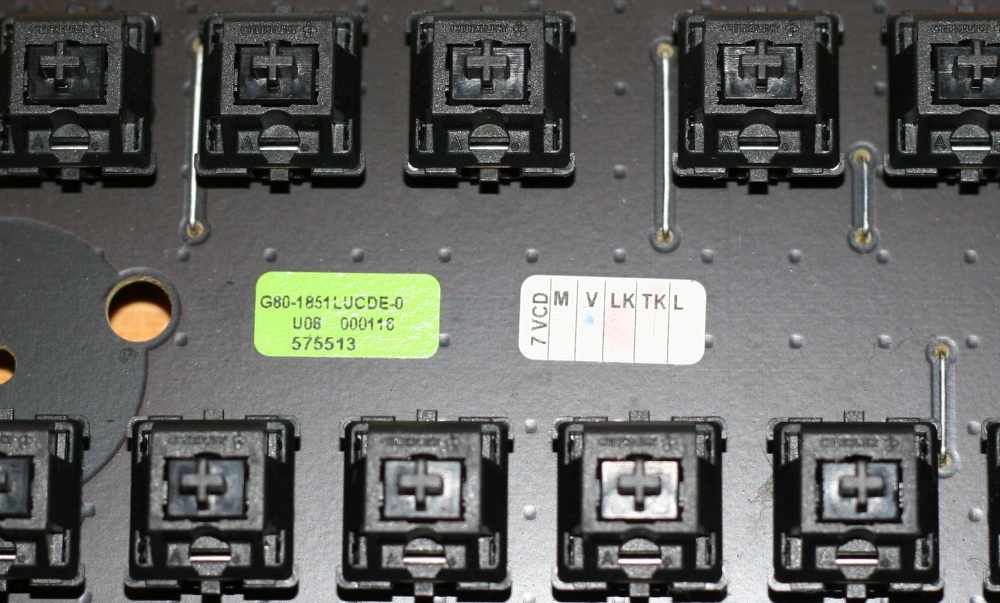
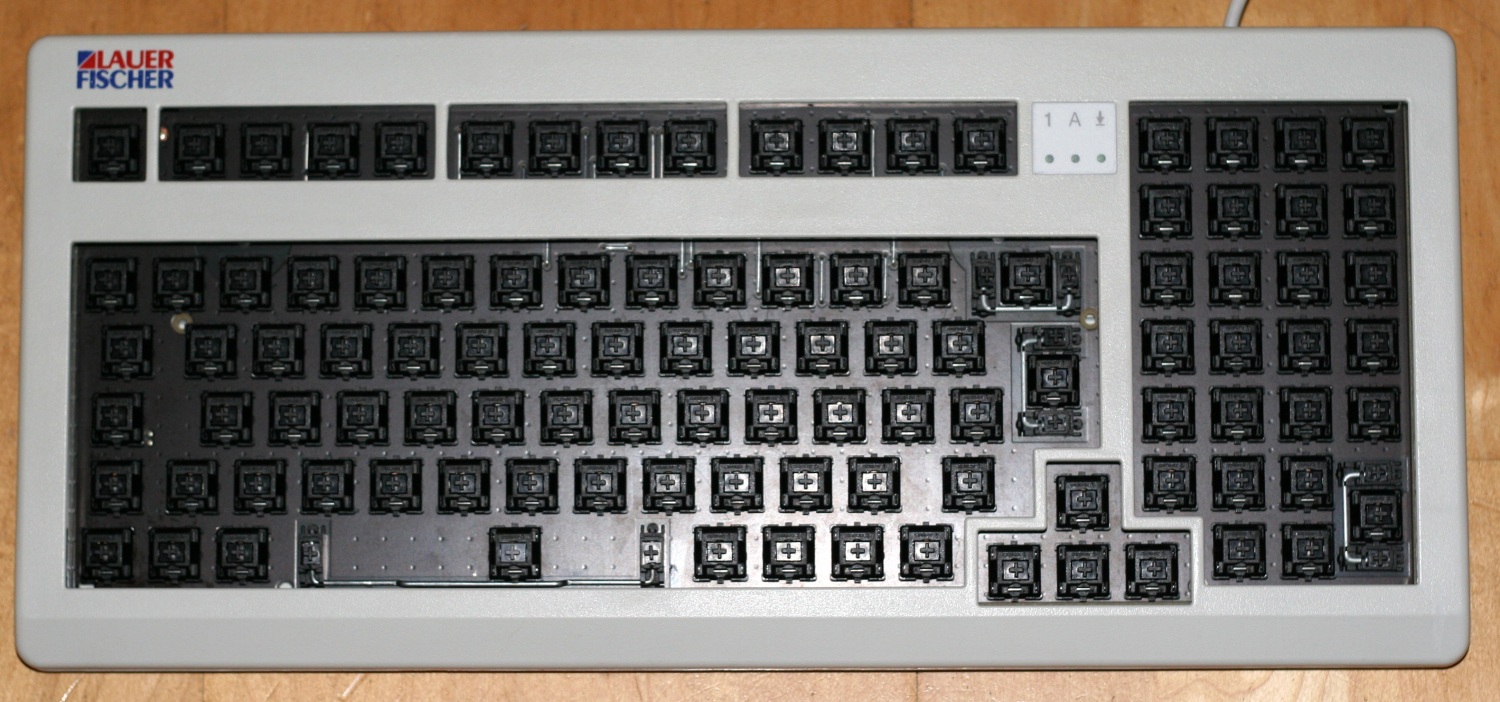
Below are the pictures that somehow document how I cleaned the board in question. I added some explanations directly to the attachments.
I, by the way, only did one cleaning session, as the PCB was really clean after the first run, which I could only really see after the PCB was completely dry, which didn't take very long, as the whole process did not involve a lot of water.
The steam cleaner I used looked very similar to the one you can see in this picture, although mine (or better: my parents') is red. The vapour stream the steam cleaner produced really was rather dry, because the steam was so hot and was released under a rather high pressure, I think. Nonetheless, I could regulate the steam pretty well, simply by varying the distance from the nozzle (I didn't use any kind of attached brush, only the steam) to the parts I wanted to clean. Keeping a high distance, I could easily blow off the remaining dust (yes, the steam was dry and fast enough to blow off the dust and did not moisten the dust in a way that it stuck to the PCB), while at a low distance, the steam cleaner almost behaved as some kind of high-pressure water blaster, although it only released a bit of liquid water when I didn't pay enough attention (after a couple of seconds of not using the steam cleaner, some water gathered at/in the tip of the nozzle due to steam cooling down).
After the first run of steam cleaning and after letting the whole thing dry for about 3 days, I detected some dirt that didn't come off. The dirt stuck to the switches, but only in a very loose way, so it could be brushed off by a paintbrush. That there still was some dirt left was (I'm almost certain of that) the result of the cleaning method itself. As I could only blow the dirt around on the PCB, some dirt naturally managed to hide in some gaps, but since this dirt didn't have this cement-like consistence any more, that was not really a problem. I could have probably got rid of it with the steam cleaner, as well, but I simply oversaw some dirt due to poor lighting conditions and the dirt transforming into some kind of dark jelly when it was unloosened by the steam.
So all in all, I think this method of keyboard cleaning has great potential, although I cannot really say a lot about the effects the steam cleaning had on the switches, as some of the switches were sticky before. Apart from that, I think the switches in question were stickier before the cleaning and I could open some switches after the cleaning that I didn't manage to open before, so maybe there is even a positive effect on sticky switches.
Oh, and last but not least, if there are any questions, feel free to ask.
Keyboard science, bitches!
- Lustique
- Location: Germany
- Main keyboard: G81-3424LPNDE-0/00
- Main mouse: Kensington Orbit Scroll Ring Trackball
- Favorite switch: Buckling Cherry MY bruewck
- DT Pro Member: -
I almost forgot to add one more picture:
I just can't throw anything away.dirge wrote:loving your dedication on getting this back in shape
Thanks!Icarium wrote:Keyboard cleaning science, developed on MX blacks for when it really matters.
You rock!
- Lustique
- Location: Germany
- Main keyboard: G81-3424LPNDE-0/00
- Main mouse: Kensington Orbit Scroll Ring Trackball
- Favorite switch: Buckling Cherry MY bruewck
- DT Pro Member: -
I think I could sell it as a gaming board:Spharx wrote:Now it looks like new ... time to put it on ebay and demand unreasonable high prices xD
Good work !
Platinum-coated USB plug, variable weight (some keys are extra hard to press for increased tactility), switches are cherry-picked and every single switch was checked by hand and lubed accordingly, originally manufactured by German manufactory Lauer-Fischer, special gaming-layout, unicum, ...
Well, I think it really is still OK as a gaming board. I used it for some TF2 in the last couple of days and was satisfied with it. But, well, I can also play TF2 with my MY black board and love it (the smoothest strafing ever, without bottoming out even once! )...
But there is one thing I find pretty odd: Normally, the Ö key somehow sticks in a way that I have to push it down rather hardly to get it moving, but then it almost works normally for some time. But a couple of minutes ago, I randomly typed the Ö key again (the keyboard sits on a chair at the moment), and there was no odd behaviour at all. I think this might be because of "heat", since board lies in the sun right now and all switches fell almost normal right now, although it isn't even really warm... Maybe the board has to be warmed up like an old diesel engine before use.
Well, if you pay for the flight and if I get a keyboard of my choice for every hour of cleaning, sure!HzFaq wrote:Can you come and clean my house?
Good job on the tidy up.
- off
- Location: the crapper, NL, EU
- DT Pro Member: -
So what kind of steam cleaner did you use (seemingly one with a small nozzle instead of being just a chamber or something), and how expensive is smn like that (I'm only familiar with a drycleaners' so excuse the q)?
That looked seriously disgusting by the way, I might've stoped reading after seeing one of those later pics if they'd been in the OP xD
- Lustique
- Location: Germany
- Main keyboard: G81-3424LPNDE-0/00
- Main mouse: Kensington Orbit Scroll Ring Trackball
- Favorite switch: Buckling Cherry MY bruewck
- DT Pro Member: -
It was something like this (not the same brand, but the size and design fit):off wrote:So what kind of steam cleaner did you use (seemingly one with a small nozzle instead of being just a chamber or something), and how expensive is smn like that (I'm only familiar with a drycleaners' so excuse the q)?
That looked seriously disgusting by the way, I might've stoped reading after seeing one of those later pics if they'd been in the OP xD
I used the smallest available nozzle, which looked like the one on the following steam cleaner, which, apart from that, has an entirely different design:
Concerning prices: I honestly don't know any more, but I think it was in the 100 €-range (the steam cleaner does not belong to me but my parents). It's not of a (well-known) brand, so it was considerably cheaper than the Kärcher (top picture) which costs about 282 € minimum (in Germany). But I think what really matters is that the steam is hot enough and is emitted with high enough pressure, because otherwise you will (partly) shoot out boiling (liquid) water, which probably would have been (more) harmful to the board in some way. The steam cleaner I used only emitted (liquid) water, when I paused for a few seconds, and then it was only residue (which was still pretty hot, as I experienced when I accidentally got some of it on my foot).
Well, I saw it personally (of course), and believe me, the pictures still don't convey how disgusting it really looked. And it did smell funny, too.
-
- Location: Germany
- DT Pro Member: -
and I though it was one of those QVC buys^^